
This post is to run through the installation of a basic M3 15.1.2 environment. As with my previous documentation of the 10.1 installation – this is about achieving a few things
- Create a completely isolated environment that I can test updates with. Even though I have access to production, test and development environments – if something goes wrong then we potentially have an expensive prospect of getting it fixed.
- As it is completely isolated, I can do dumb stuff. The things that make sense in the wee hours of the morning, but once they blow up in your face you reflect and think “That was never going to work”
- Provides a better understanding of how the newer versions of M3 hang together.
In this post I wanted to minimise the number of servers I needed to spin up – so the entire M3 environment is running off a single virtualised server. Needless to say, shortcuts have been taken – especially around security and some of the configuration. Likewise no consideration has been given to tuning or performance implications.
In general I’ve followed the instructions, but in some instances needed to take a bit of a leap of faith. Where I followed the manual in a section I’ve included the document I was referencing. For convenience I have also included the files that I used for installation.
Following these instructions should give you a basic running test environment, with the M3BE, M3 UI Adapter, Smart Office, LDAP Session Provider and H5 Enterprise client.
Even though the M3 environment is on a single server, I do have Active Directory and DNS set up on another server which acts as another part of my test network.
Please excuse some of the highlighting – occasionally it shoots across the screen which appears to be a bug in the beta version of Windows I’m using and it got rather tedious trying to correct all of the screen captures.
Files
Below is a list of the files that I grabbed to do this installation.
Infor
FP1_15.1_MAU.zip
FP1_15.1_MVX.zip
FP2_15.1_MAU.zip
FP2_15.1_MVX.zip
grid-lcm-installer-11.1.11.0.38.zip
Infor_ION_Grid_Extension_11.1.11.1.lcm
InforSmartOffice_1020_LCM10.zip
LifeCycleManagerServer_10.1.2.1.jar
M3_H5_Client_Enterprise_10.2.2.0_LCM10.zip
M3_UI_Adapter_10.2.2.0_LCM10.zip
M3BE_15.1_MAU.zip
M3BusinessEngine_15.1.zip
M3Foundation_10.1.2.0.lcm
Microsoft
en_sql_server_2012_standard_edition_with_service_pack_2_x64_dvd_4692562.iso
Oracle
jdk-7u79-windows-i586.exe
Servers
M3 Business Engine
Name: M3BE152
IP: 10.255.255.50
Active Directory Server
A user, m3auth has been set up in AD for LCM to authenticate against
A group called LCMAdmin has been set up, and m3auth and Administrator have been added to it.
IP: 10.255.255.20
LDAP Port: 389
Users set up in Active Directory:
Administrator
m3srvadm
msrvadm
mvxsecofr
Install MS Server Standard 2012r2
C: 40 gig
D: 40 gig
Install MS SQL Server 2012 Standard 64bit
This is installed for convenience rather than tuning or good security.
File
en_sql_server_2012_standard_edition_with_service_pack_2_x64_dvd_4692562.iso
Installation Document
M3BEIG_15.1.0.0_W.pdf
- Run Setup
- Select Installation
- Select New SQL Server stand-alone installation or add features to an existing installation

- Click OK

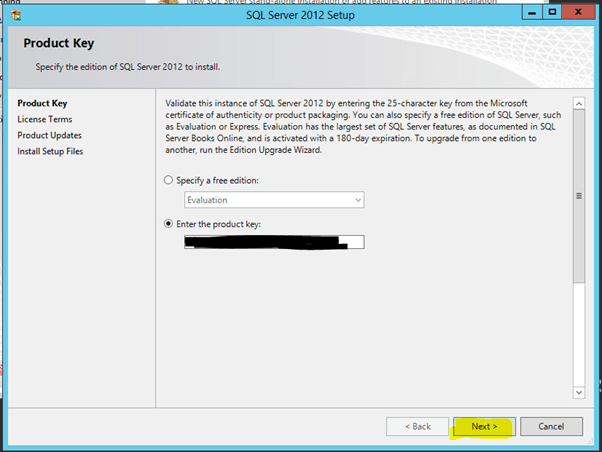
- Enter Product Key, click Next
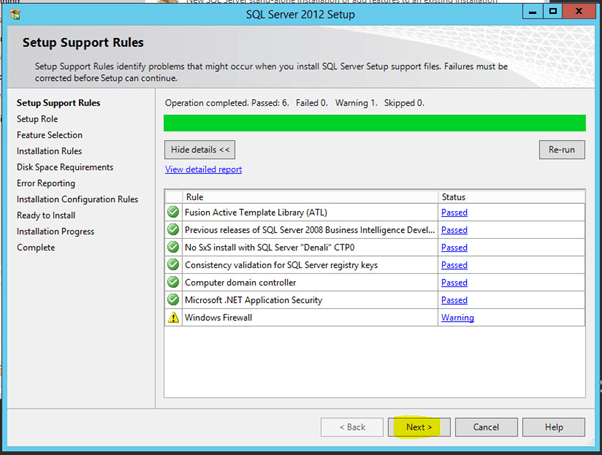
- Accept license terms and click Next

- Click Next
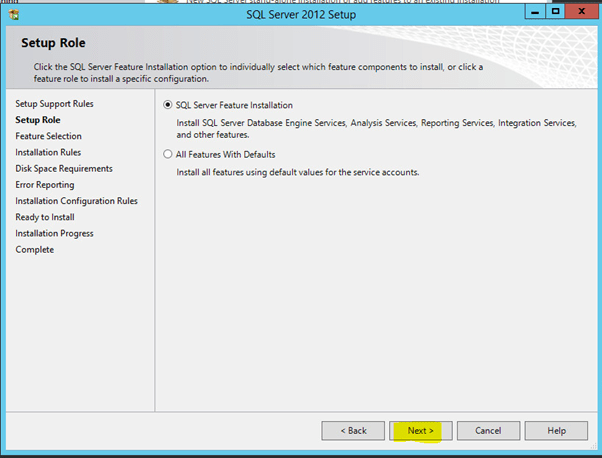
- Click Next
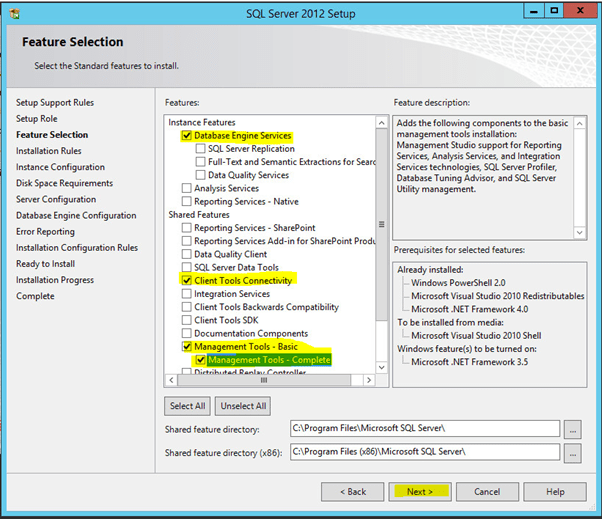
- Select Database Engine Services, client tools, management tools, click Next
- Click Next
- Click Next

- Click Next

- Click Collation

(It is recommended to use a specific account, but I’m just running with the default) - Click Customize

- Select Latin1_General, tick Binary, click OK

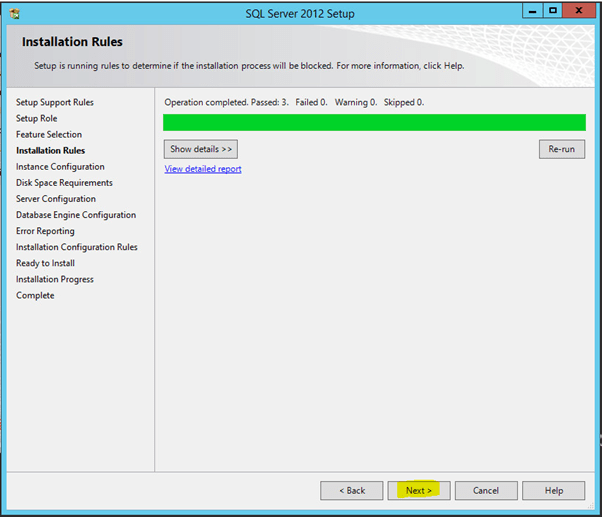
- Click Next

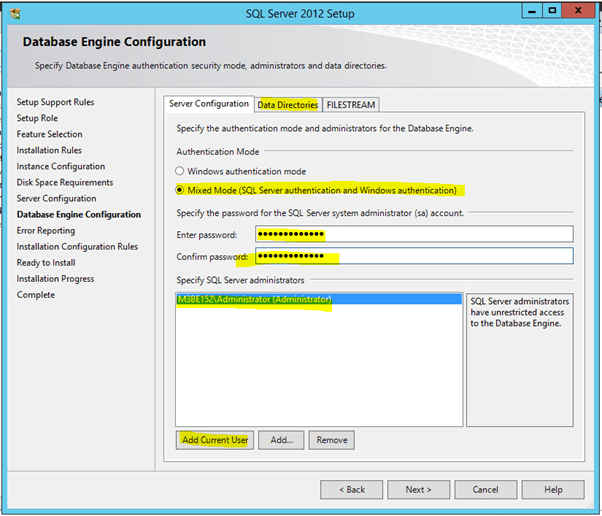
- Set authentication to Mixed Mode, set a password, assign the current user as an administrator. Click Data directories.
- I’m storing my database in D:\Data
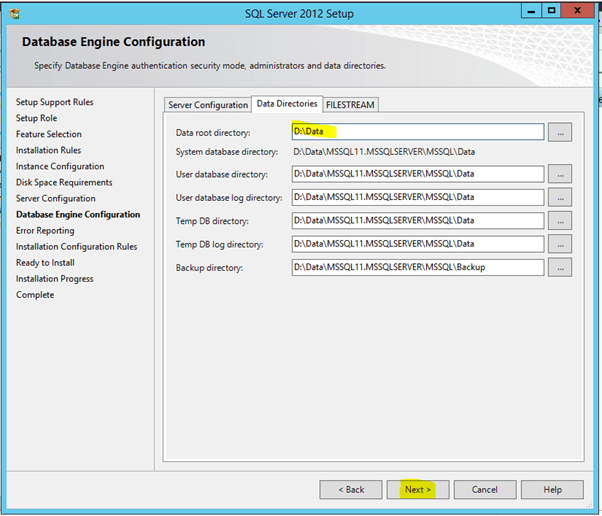
- Click Next

- Click Next
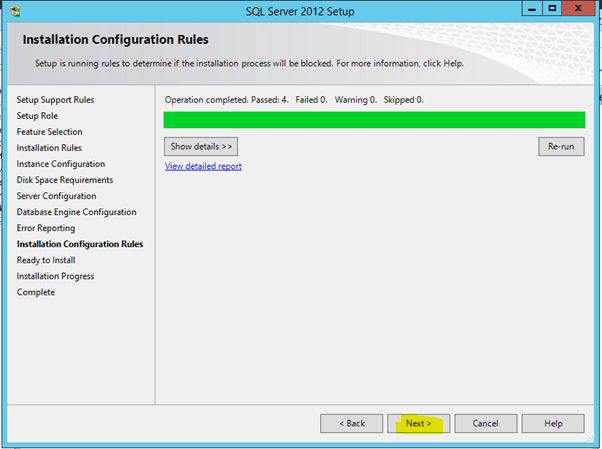
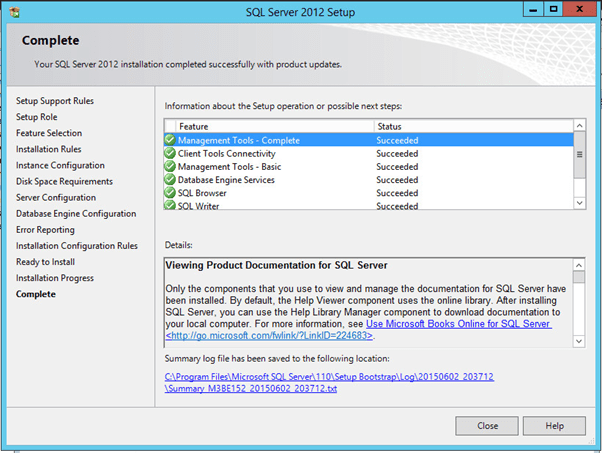
- Click Install

- Click Close
- Open SQL Server Configuration Manager

- Select SQL Server Services and ensure that both SQL Server, and SQL Server Agent are set to automatic and are running. With my install I needed to adjust SQL Server Agent

- Check that the port for the SQL Server is set to static (SQL Server Network Configuration -> Protocols for MSSQLSERVER -> TCP/IP Properties
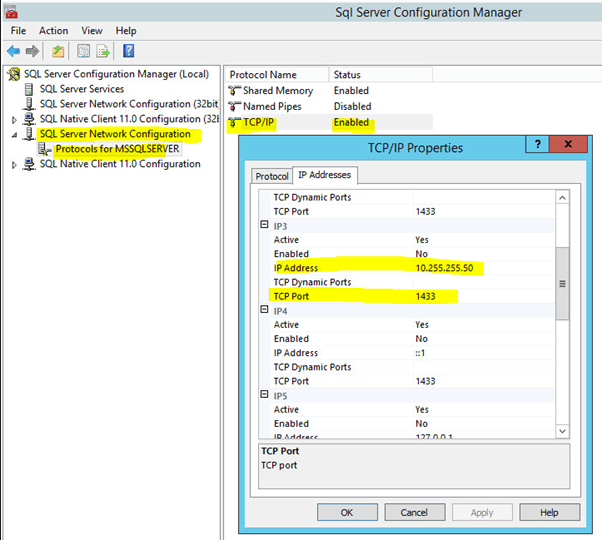
(my IP on my server is 10.255.255.50) - We should set up specific ports in the firewall, but as this is an isolated environment I am just going to disable the firewall altogether.

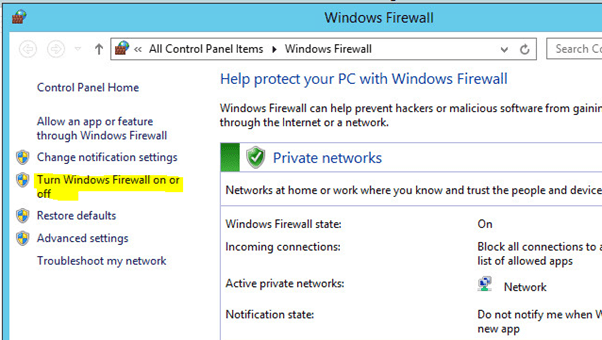
- Turn Windows Firewall On or off
- Turn off Windows Firewall
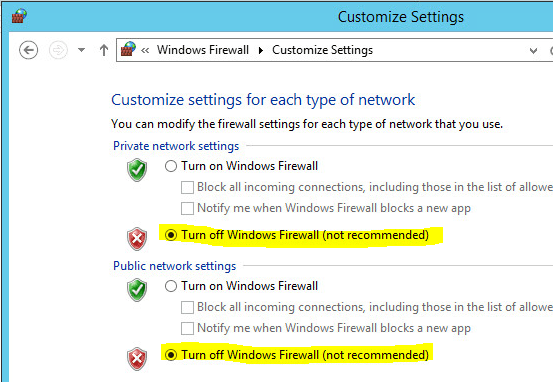
- Click OK
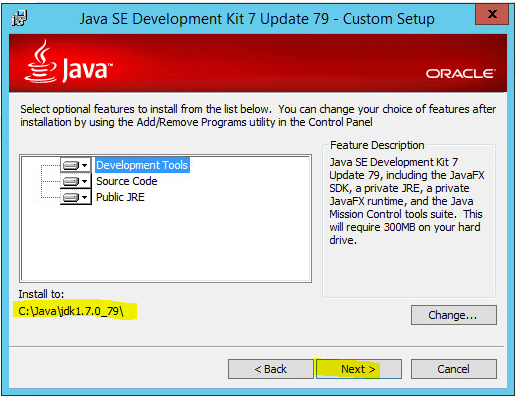
Install Java
Note that with our Java install we deviate from the standard install process.
File
jdk-7u79-windows-i586
Guide
M3BEIG_15.1.0.0_W.pdf
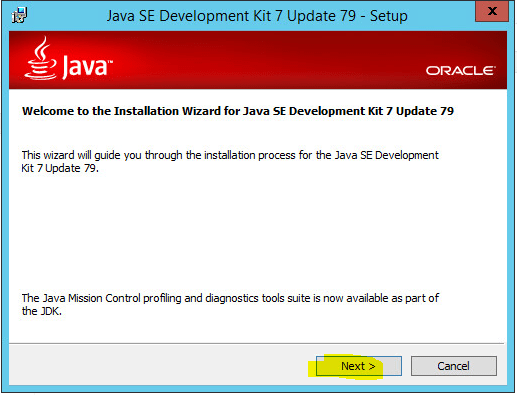
- Run the install
- Next
- Change the path as per the recommendations from the Infor install document (Click Change)
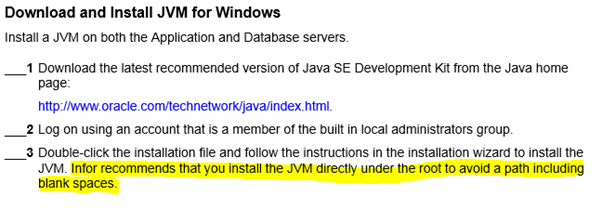
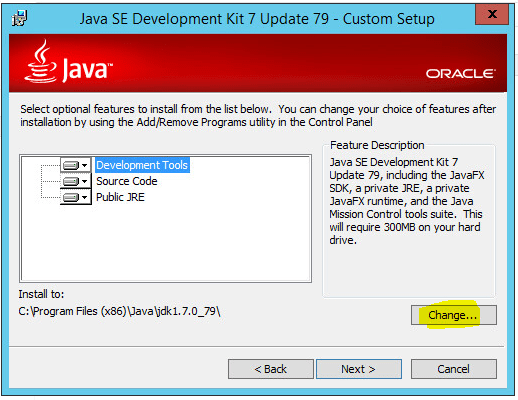
- Change the path to remove spaces, click OK
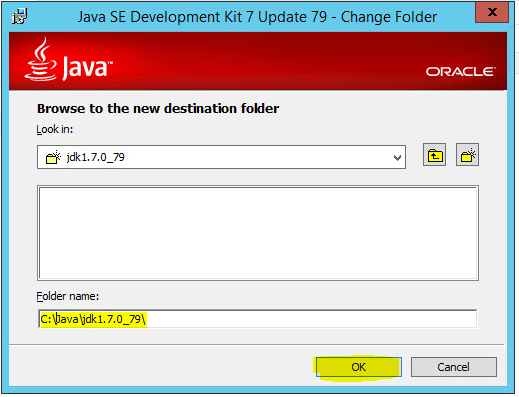
- Click Next
- Click Change to Change the path again

- Remove the spaces from the path again, click OK
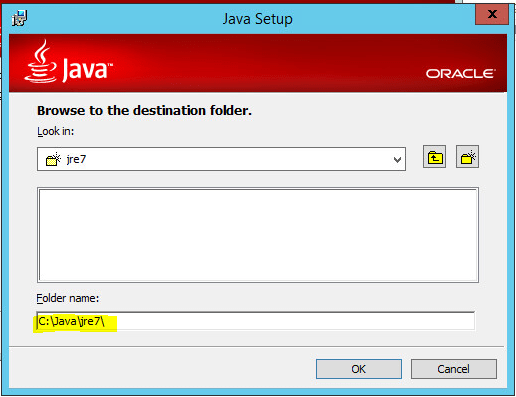
- Click Next
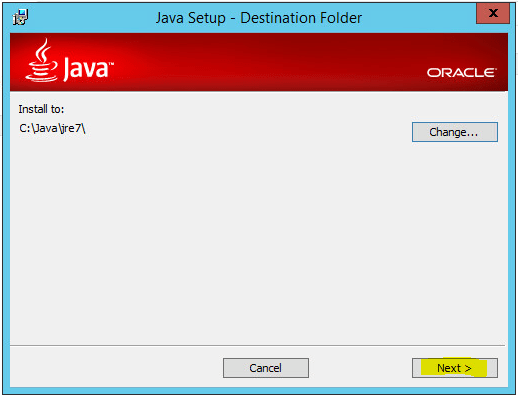
- Click Close

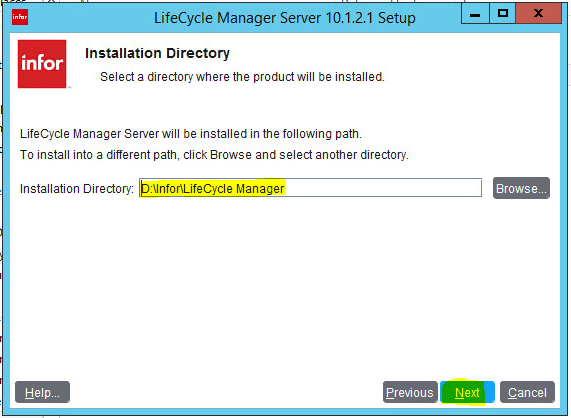
Install LifeCycle Manager Server
File
LifeCycleManagerServer_10.1.2.1.jar
Installation Document
LCMIG_10.1.2.0_W.pdf
- Double click on LifeCycleManagerServer_10.1.2.1.jar
- Click Next

- Click Next

- Set a path and click Next
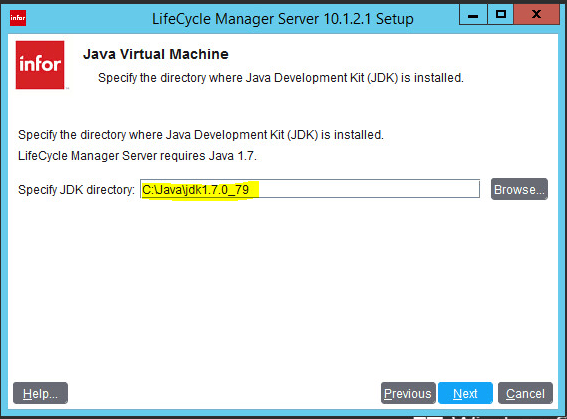
- Specify the path to the JDK we installed earlier, click Next
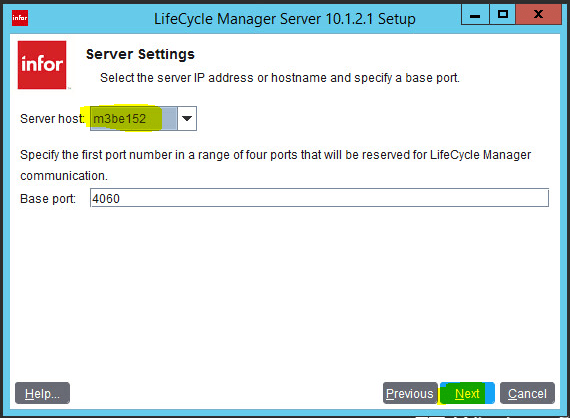
- Set the server host to the current server and click Next
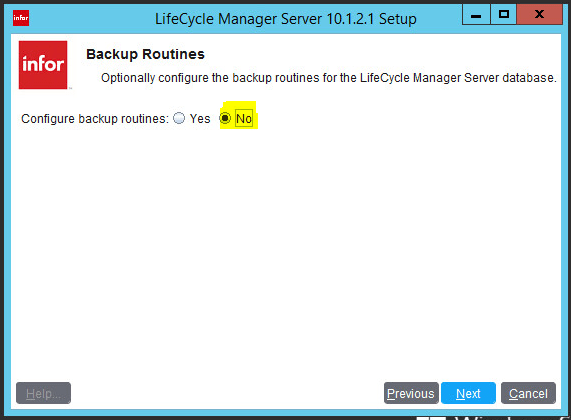
- Click No for backup routines, next
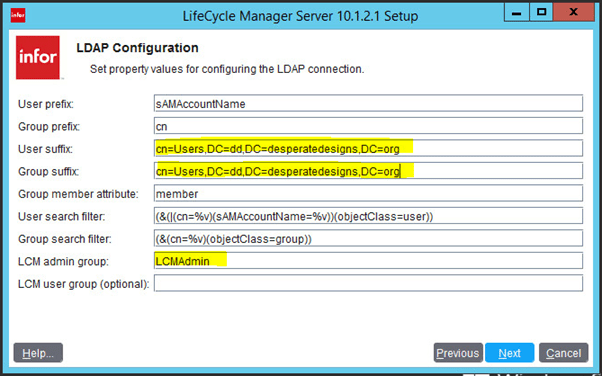
- I have my own LDAP Server – it is an AD server (unlike my previous article). I’m not using SSL as it is a test next network
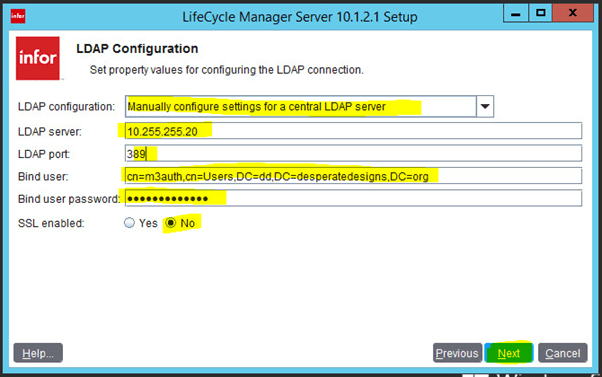
- Change the configuration settings – you’ll need the user and group suffix to tell LCM where to look for your users, and also point to a group that you’ve set up for the LCM admins
- I’m going to let LCM create a user to run the LCM server service
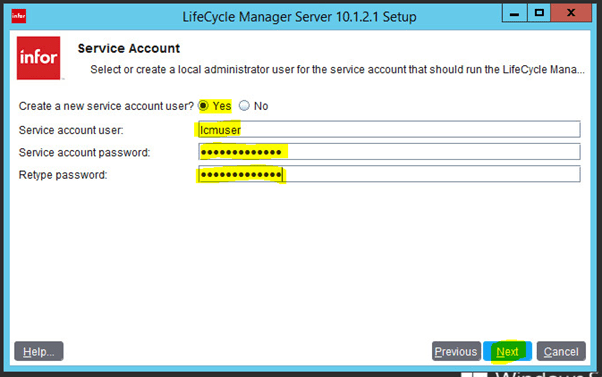
- Click Next

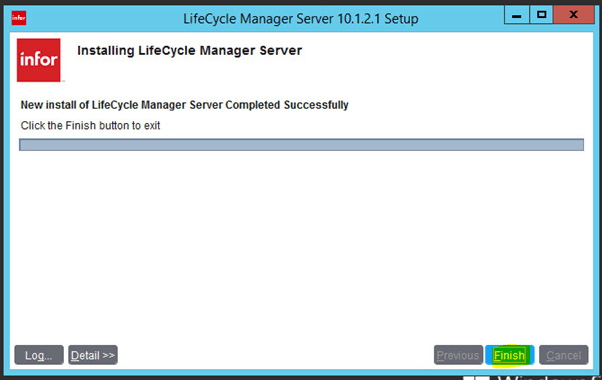
- Click Finish
- Check that the LCM service is running from Task Manager

Install LCM Service
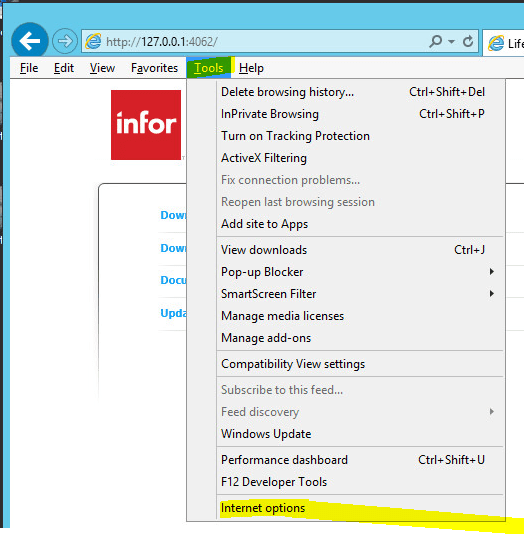
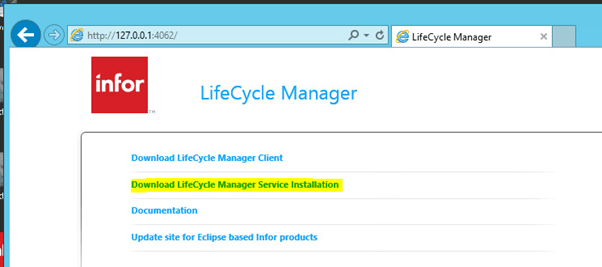
- Browse to http://127.0.0.1:4062

- Tools -> Internet Options
- Click Security, Trusted Sites -> Sites
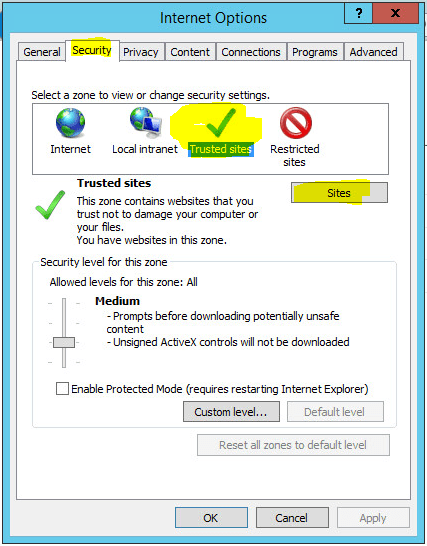
- Add http://127.0.0.1

- Click Download LifeCycle Manager Service Installation
- Click Save

- Click Open

- Key in the details of the LCM Server

- Using the default Name

- It’s detected the main IPv4 address, so I’ll press enter
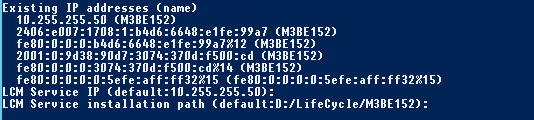
- Default path with me is ok

- Default Port is OK

- Defaults are OK

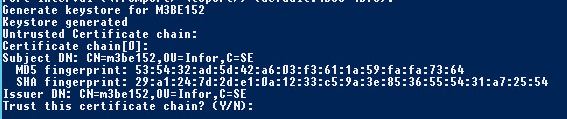
- Select Y to trust the cert
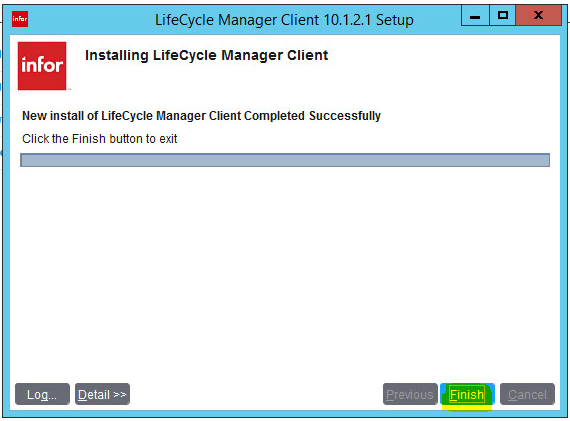
Install LCM Client
- Browse to http://127.0.0.1:4062
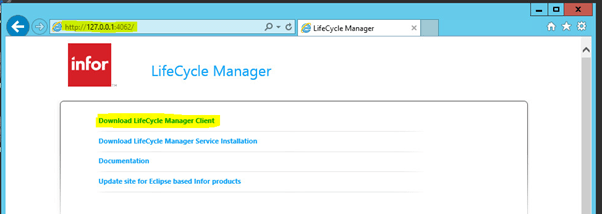
- Click Download LifeCycle Manager Client

- Save

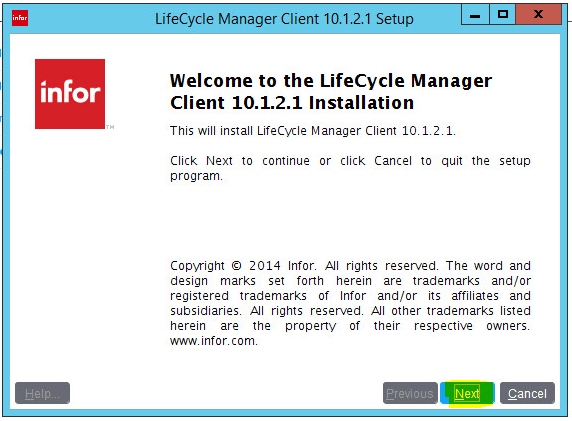
- Click Open

- Click Next
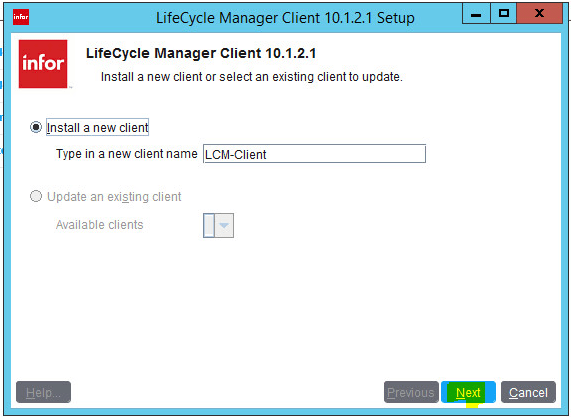
- Click Next
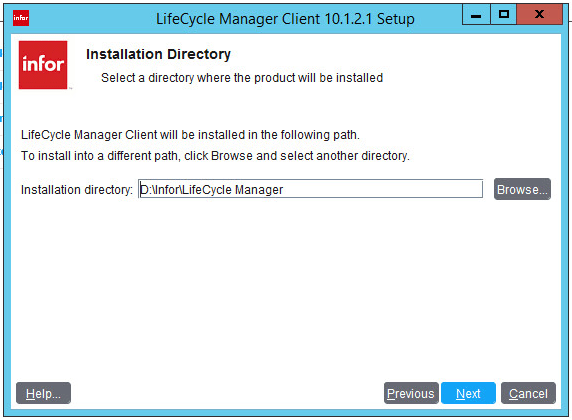
- Click Next
- Click Next

- Click Finish
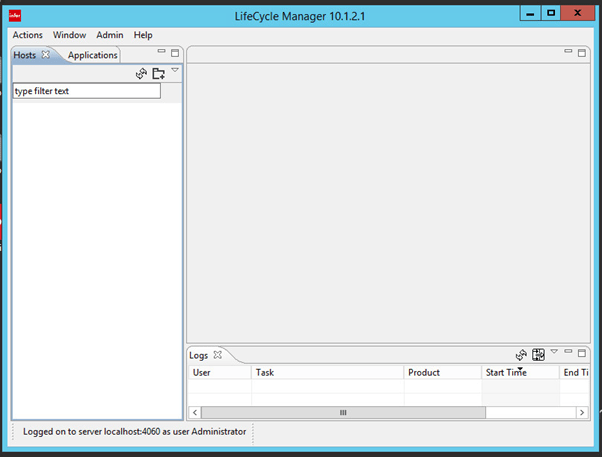
- Click Click on the LCM-Client Icon
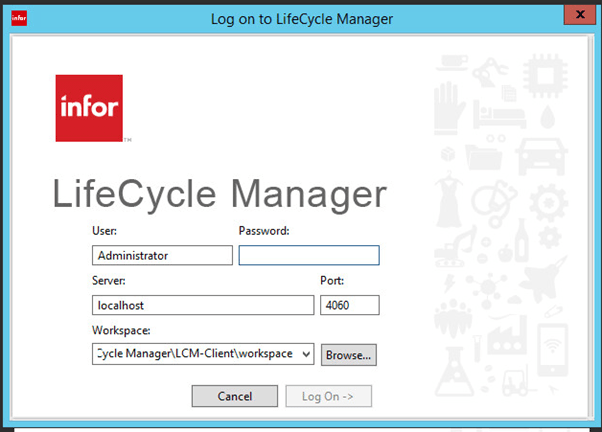
- Key in the username and password (as this is on the same server as the LCM Server, I am just using localhost). This is a user that MUST be in the LCMAdmin group we created in AD

- Accept the cert

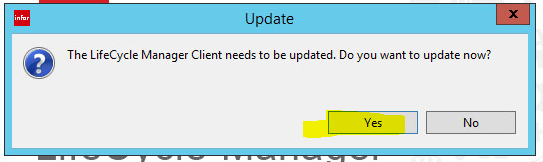
- Click Yes
- Click OK

- Log in again
- Recently Infor have released an update to the default JVM settings for grid applications, click yes to accept them
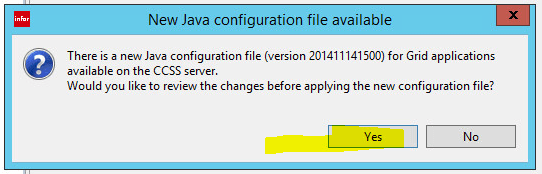
- Apply new version

- Click OK
- Done
Add M3BE and Foundation to LCM
Files
M3BusinessEngine_15.1.zip
M3Foundation_10.1.2.0.lcm
Installation Document
M3BEIG_15.1.0.0_W.pdf
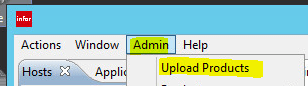
- In LCM Click Admin -> Upload Products
- Click Upload
- Locate and select the M3BusinessEngine_15.1.zip and M3Foundation_10.1.2.0.lcm
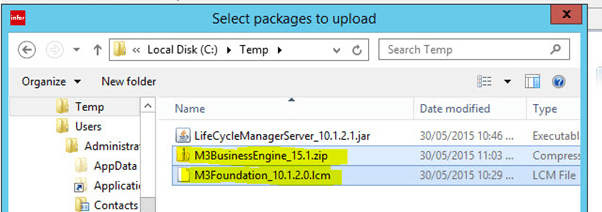
We have the FPs to take us up to .2 - Click OK
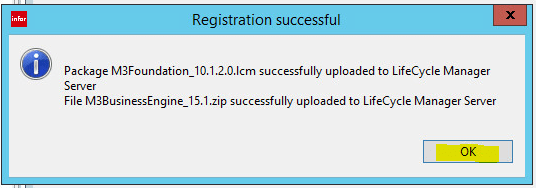
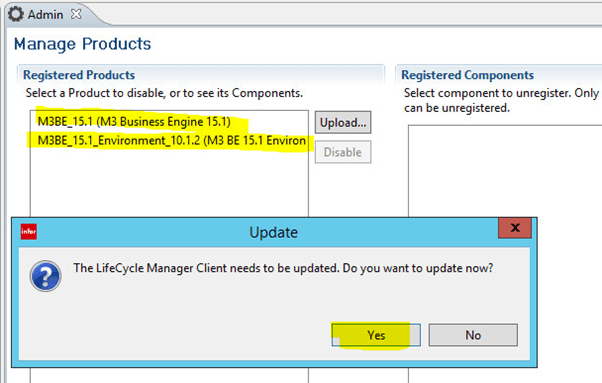
- We can see the two packages have been added, click on Yes to restart LCM
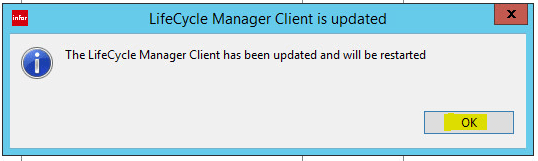
- Click OK
- Log in to LCM
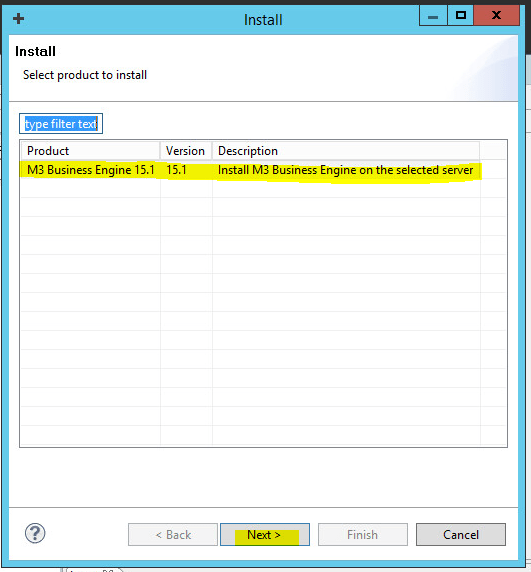
Install the M3 BE
Installation Document
M3BEIG_15.1.0.0_W.pdf
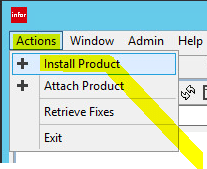
- In LCM select Actions -> Install Product
- Click Next
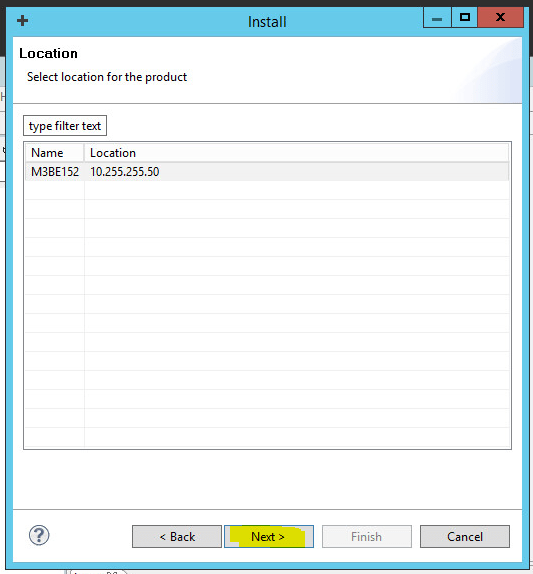
- Click Next
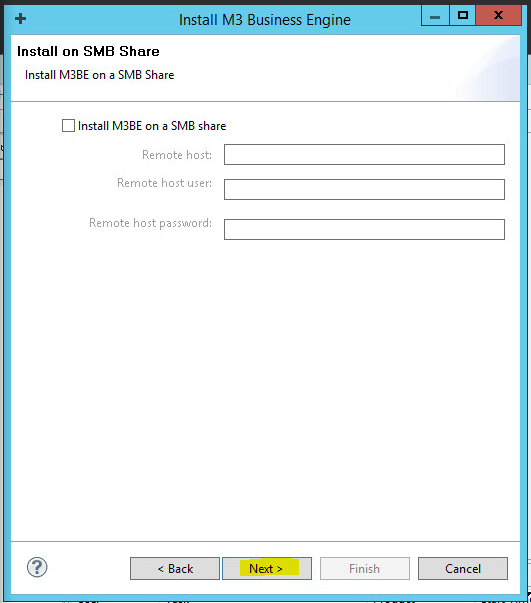
- Click Next
- Click Select
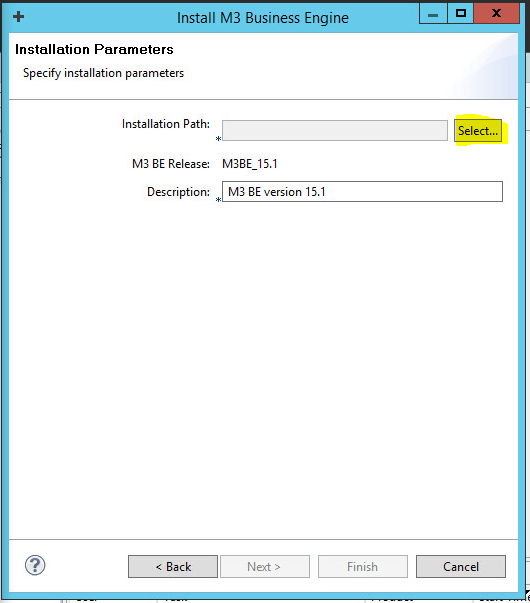
- Assign new path
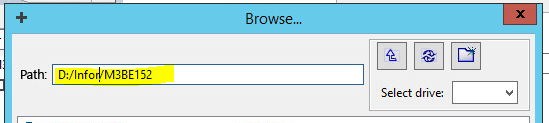
- Click Next
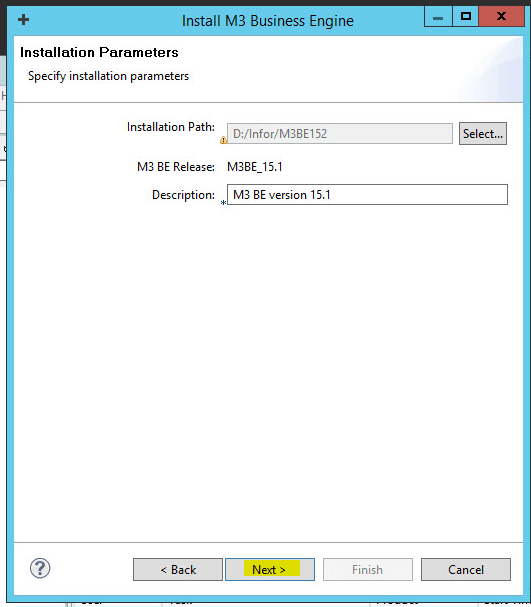
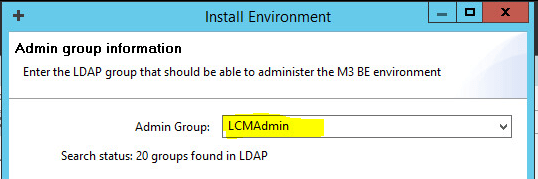
- Click Next
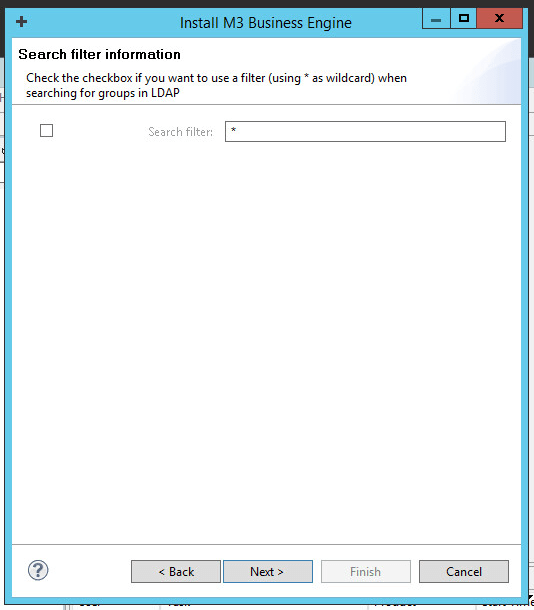
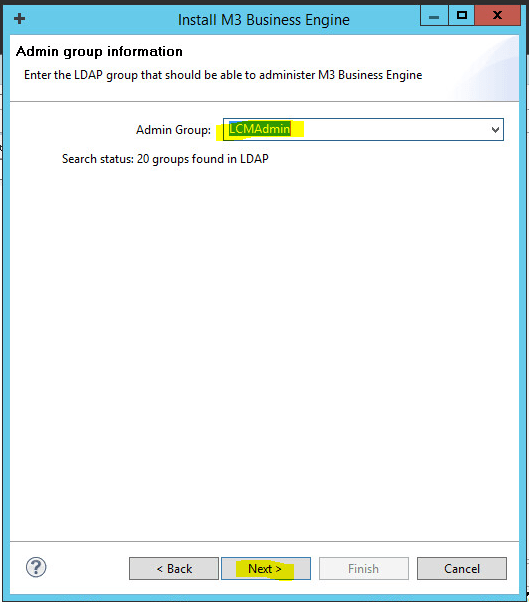
- Select the Admin group we set up in LDAP, click Next
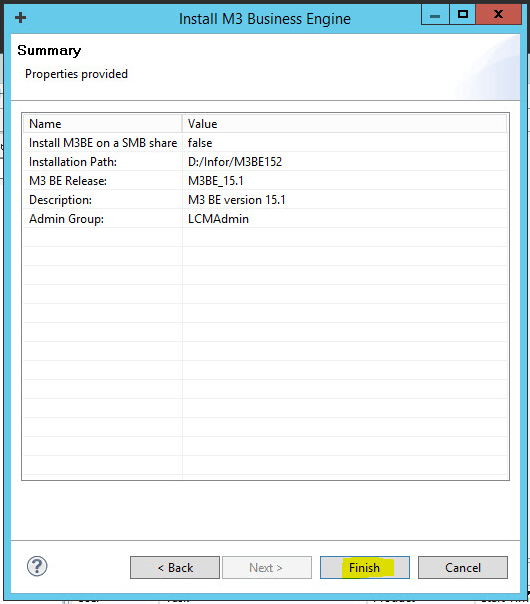
- Click Finish – this will take a while
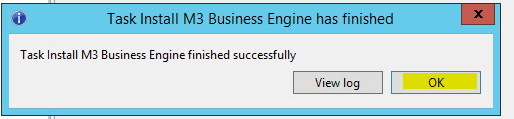
- Click OK
Attach Database
Installation Document
M3BEIG_15.1.0.0_W.pdf
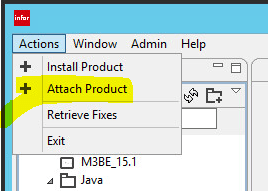
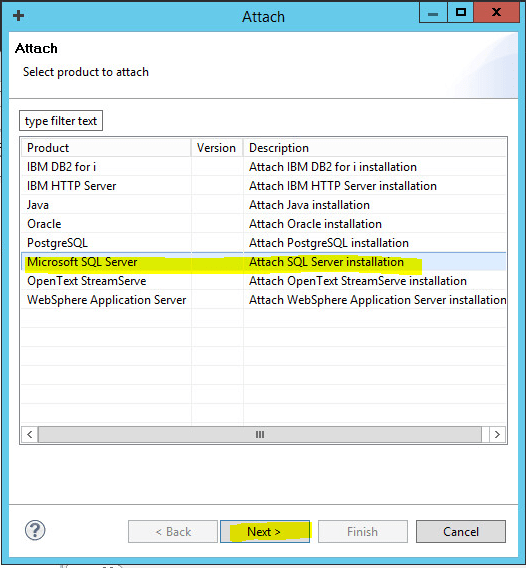
- In LCM -> Actions -> Attach Product
- Select Microsoft SQL Server and click Next
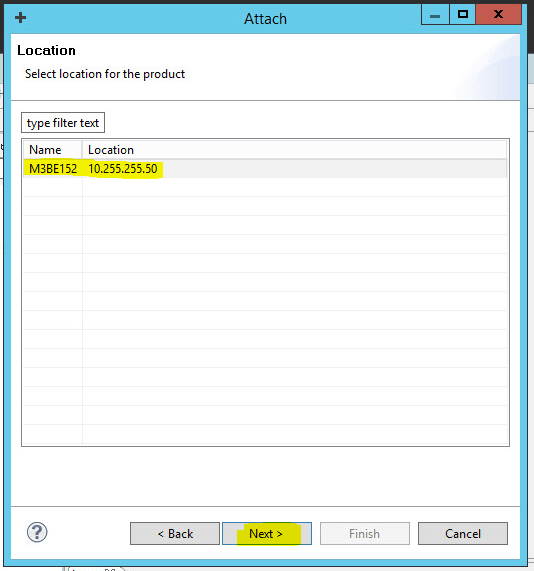
- Select where LCM Server is installed, click Next
- I’m just dropping all of the files in to the one directory
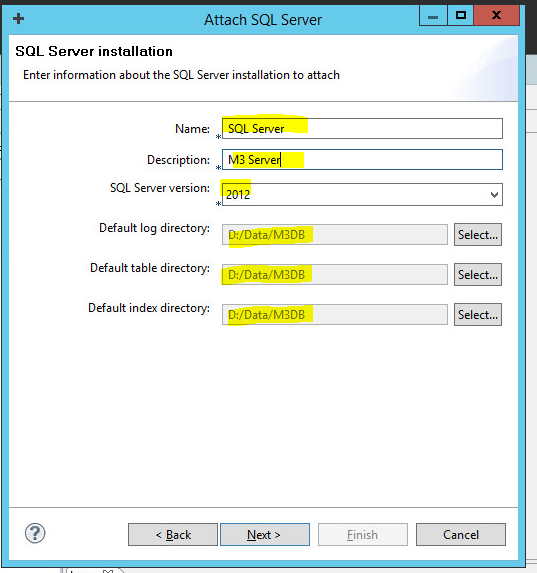
- Click Finish
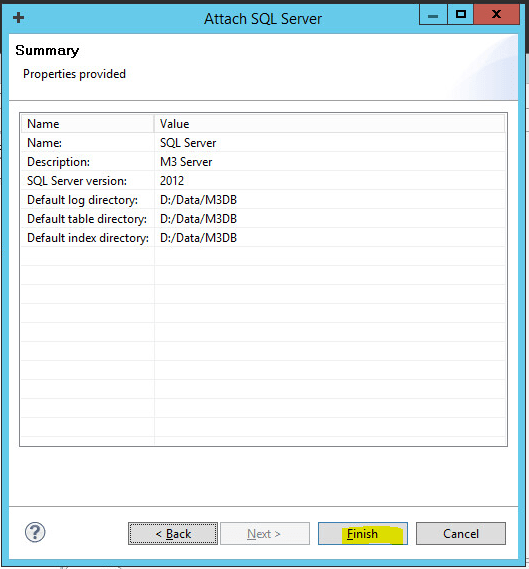
- Click OK
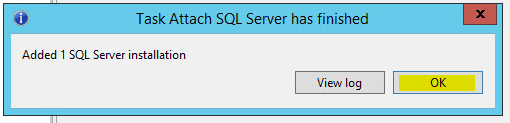
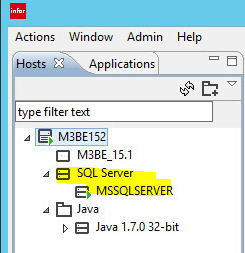
- We can now see our SQL Server entry in LCM
Create a database for our Grid
We need to create a database for our Grid
- Open Microsoft SQL Management Studio
- Right Click on Databases -> Select New Database
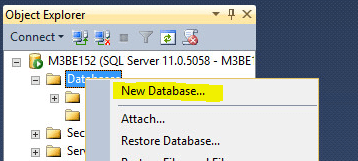
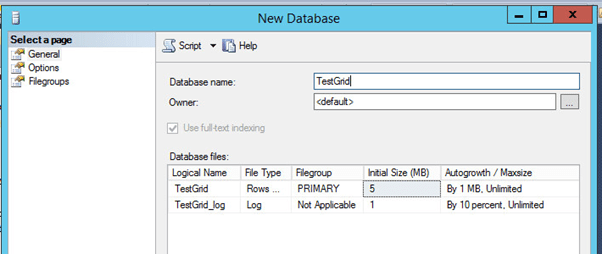
- Give it a name
Install the ION Grid
File
grid-lcm-installer-11.1.11.0.38.zip
Installation Document
GRIDIG_11.1.11.0_UWA.pdf
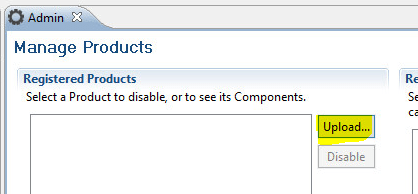
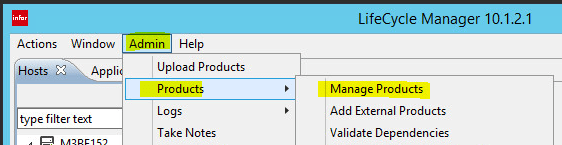
- In LCM -> Admin -> Products -> Manage Products
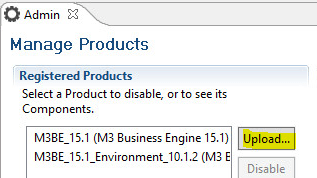
- Click Upload
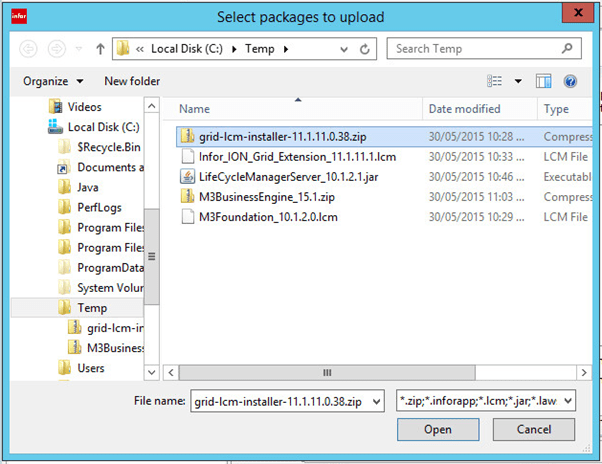
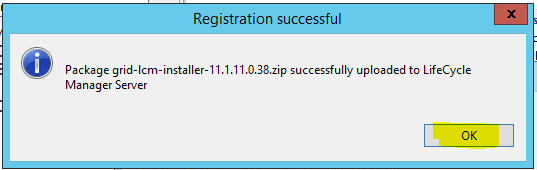
- Select grid-lcm-installer-11.1.11.0.38
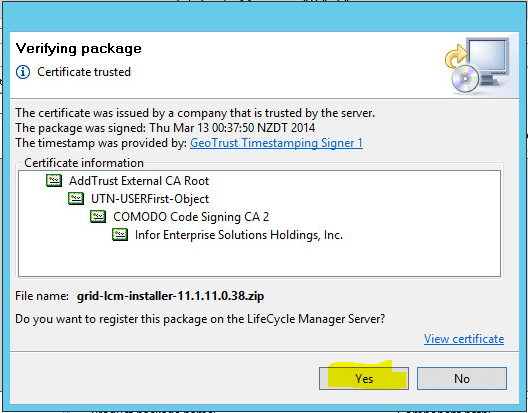
- Accept the cert
- Click on OK
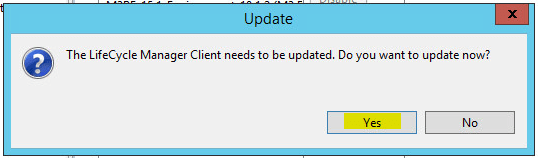
- Click Yes
- Click OK
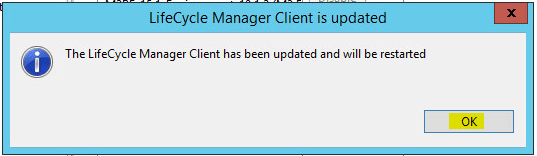
- Log back in to LCM
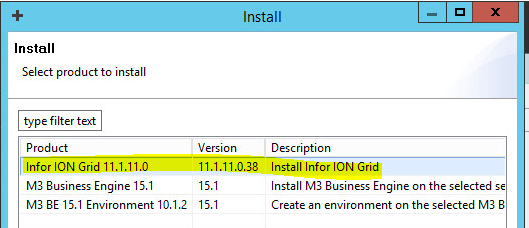
- Actions -> Install Product

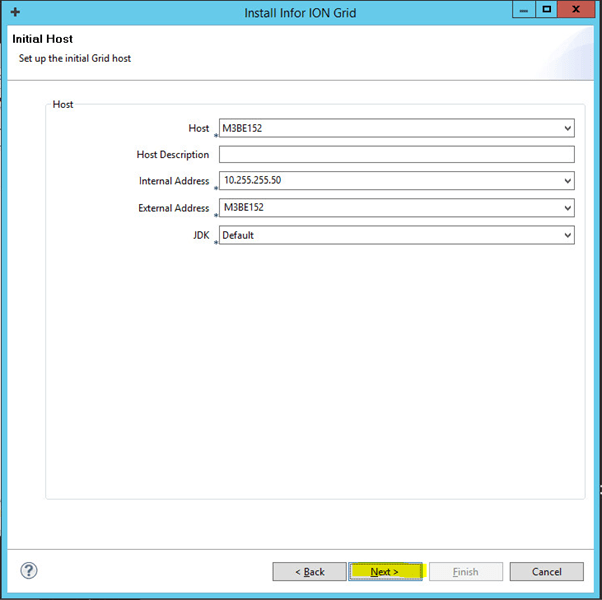
- Select Infor ION Grid 11.1.11.0, Click Next
- Install in to Test, click Next

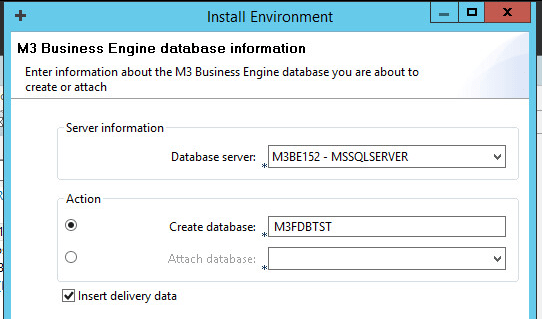
- Enter the database details for our grid

- Click Next
- We’ll accept the default ports
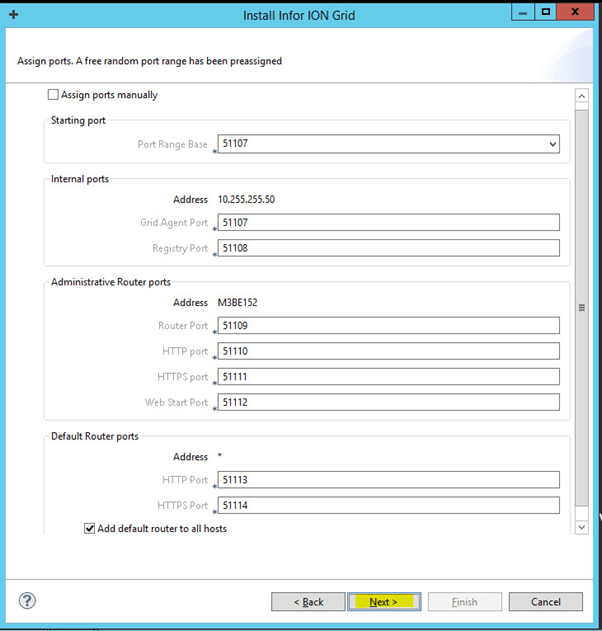
- Click on Finish
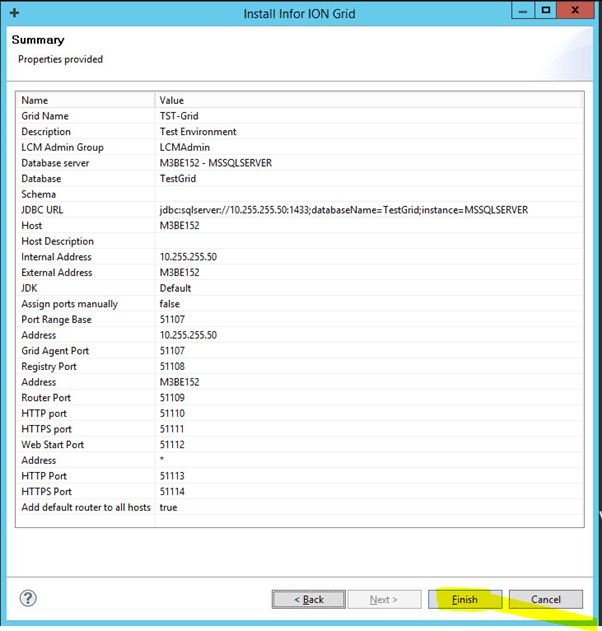
- Click OK

Install our Environment
Installation Document
M3BEIG_15.1.0.0_W.pdf
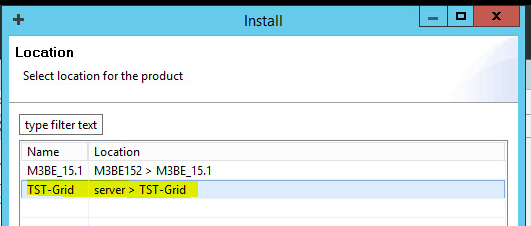
- In LCM Right click on our TST Grid we set up earlier -> Install Product
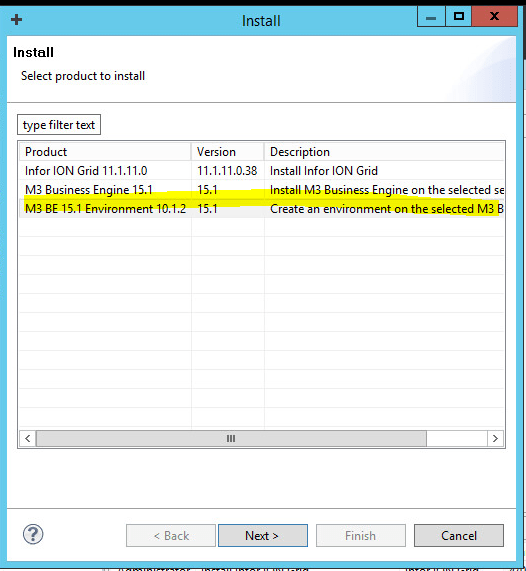
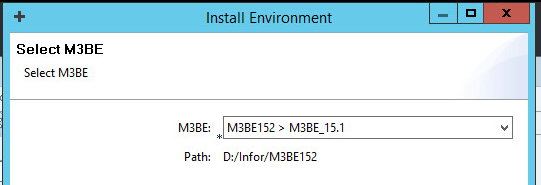
- Select the Grid we installed earlier and click Next
- Click Next
- Click Next
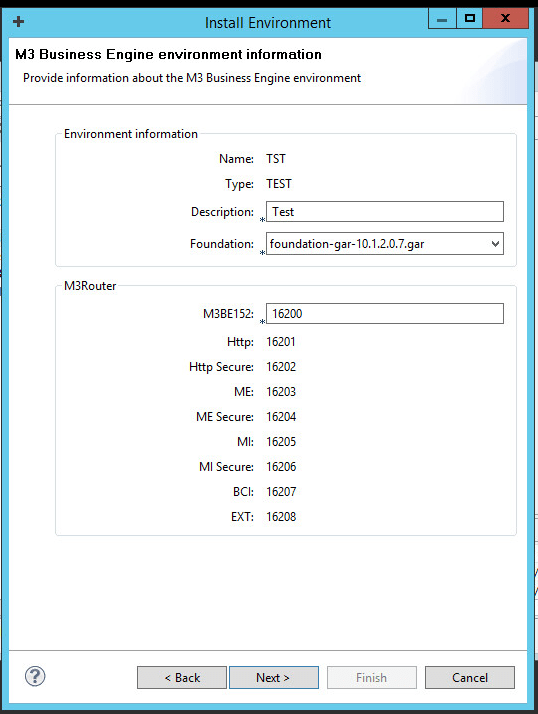
- Click Next
- Click Next
- Click Next
- Enter our sa password for the database, click Next
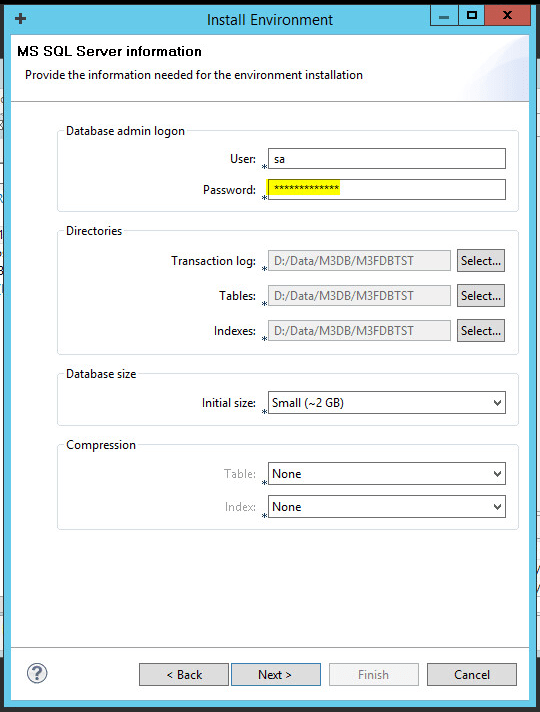
- Enter some passwords for MDBADM and MDBUSR, I’ve dropped some garbage in to the sender/receiver and mail server

- Click Next

- Click Finish
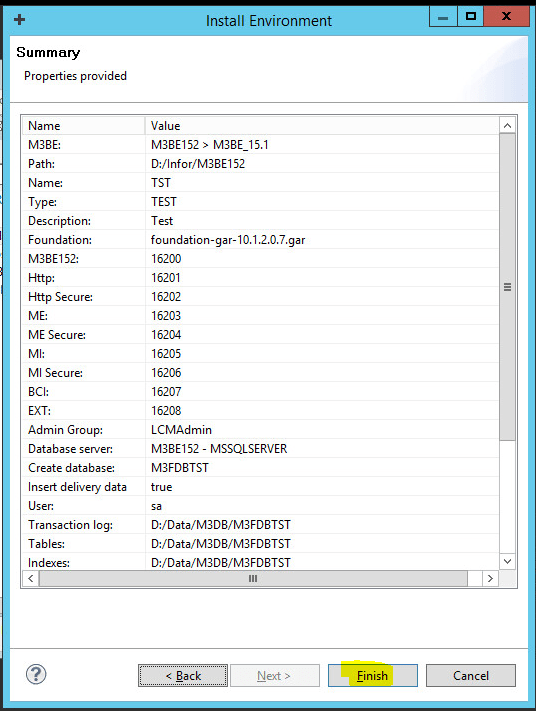
- Click on OK
- And we have our M3BE Environment installed

Install the other BE Packages
This will take us up to version 15.1.2
Files
This includes fixpacks, and market mods
FP2_15.1_MVX.zip
FP1_15.1_MVX.zip
FP1_15.1_MAU.zip
FP2_15.1_MAU.zip
M3BE_15.1_MAU.zip
Installation Document
M3BEIG_15.1.0.0_W.pdf
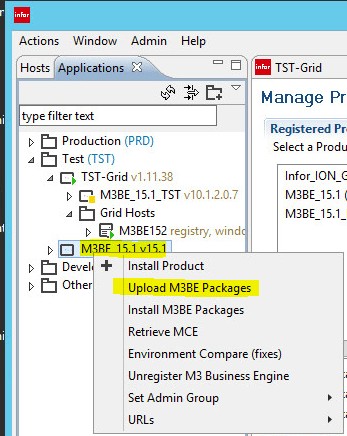
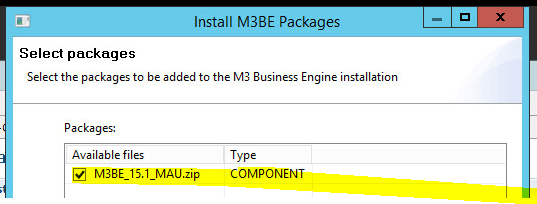
- In LCM -> M3BE -> Right Click and Upload M3BE Packages
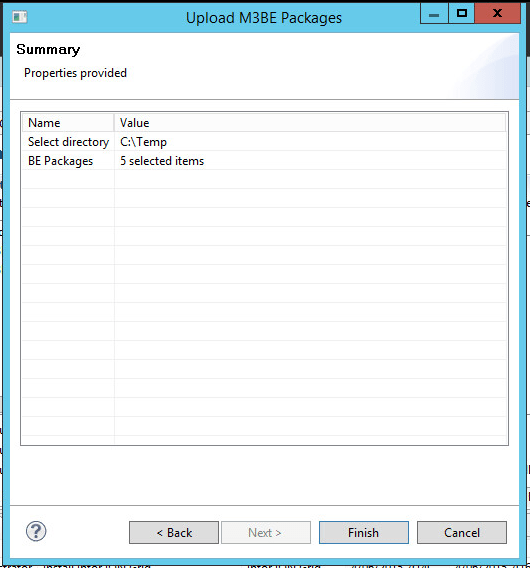
- Tick the packages we want to install and click Next

- Click Finish
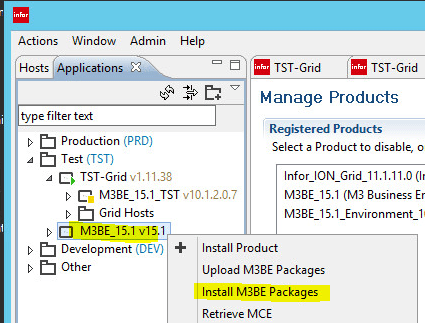
- Right Click our M3BE and select Install M3BE Pacakges
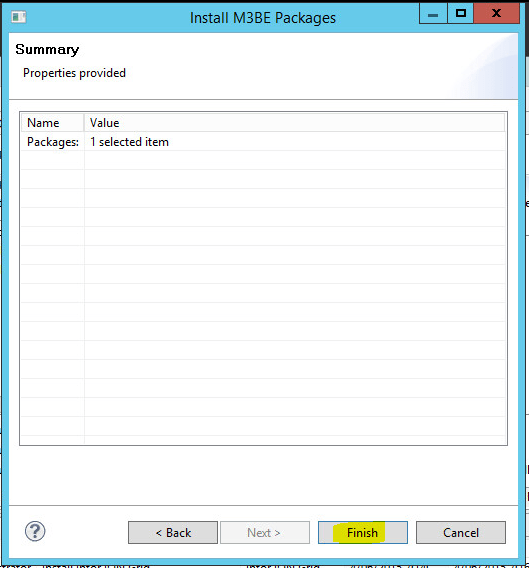
- Select the components to install and click Next
- Click Finish
- Click OK
Create the System Component
Installation Document
M3BEIG_15.1.0.0_W.pdf
- In LCM and on M3BE Environment, right click and select Environment Configurator

- Click Components -> Click the + icon
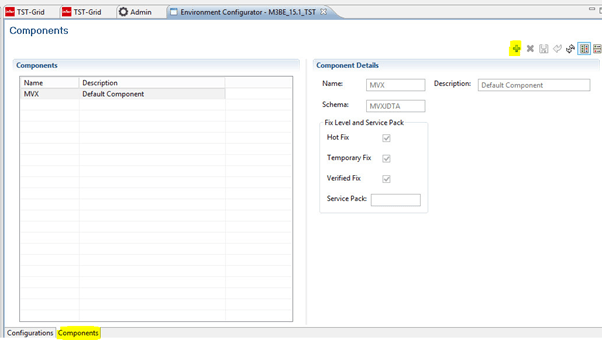
- I’m installing the AU/NZ Regional mods, typically MAU, so enter MAU

- Click Save
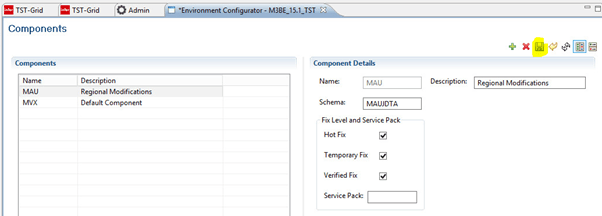
- Click on OK
- Click Configurations, click the + icon
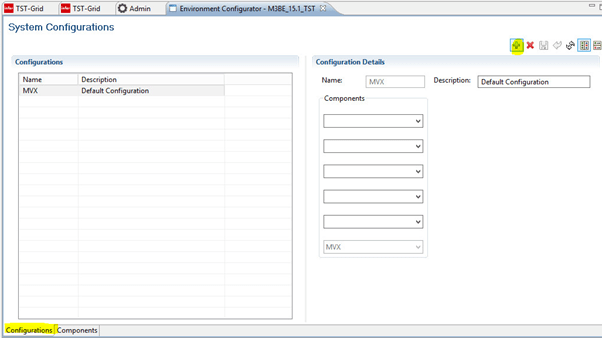
- Enter MAU for the regional modification
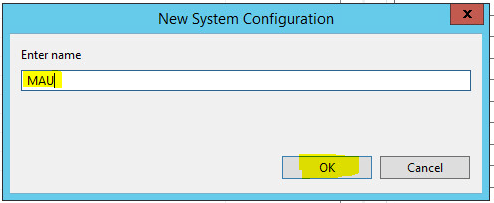
- Give our entry a name and click Save

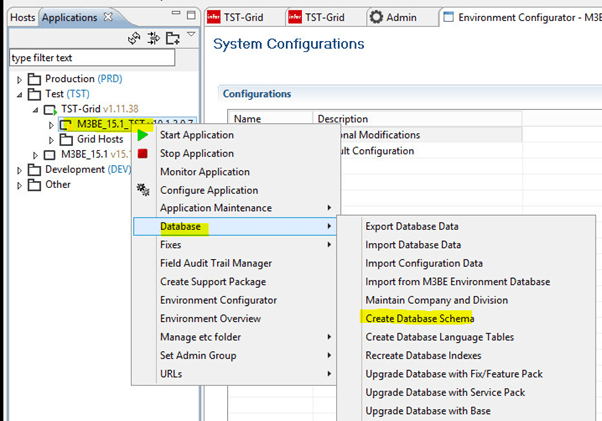
Create the Database Schema
Installation Document
M3BEIG_15.1.0.0_W.pdf
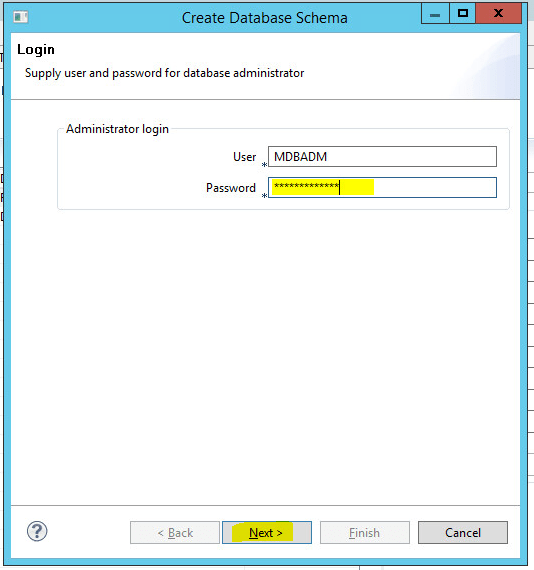
- LCM -> Right Click on the new environment -> Database -> Create Database
- Enter the password we provided earlier for MDBADM
- M3FDBTST is the schema for a Windows install
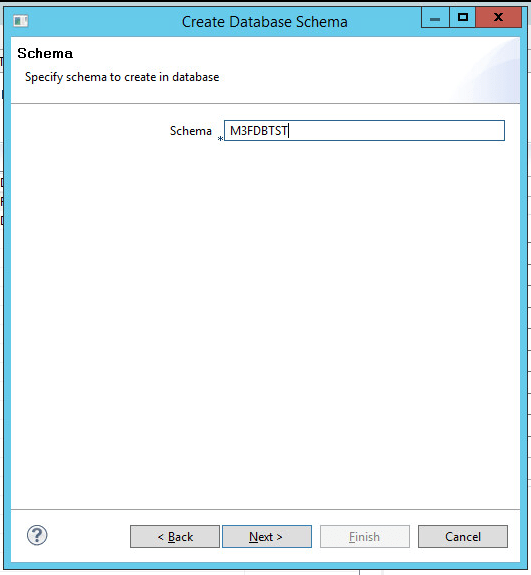
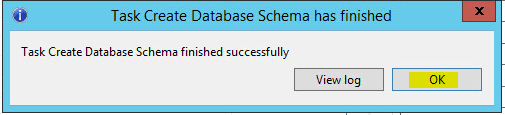
- Click Finish

- Click OK
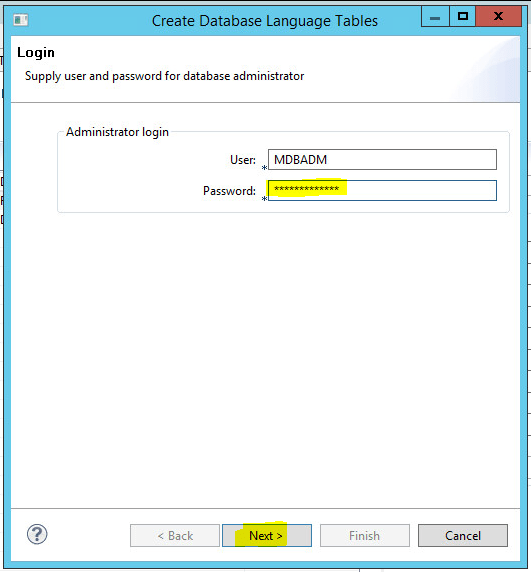
Create Language Tables
Installation Document
M3BEIG_15.1.0.0_W.pdf
- LCM -> Right Click on the new environment -> Database

- Enter your MDBADM password, click Next
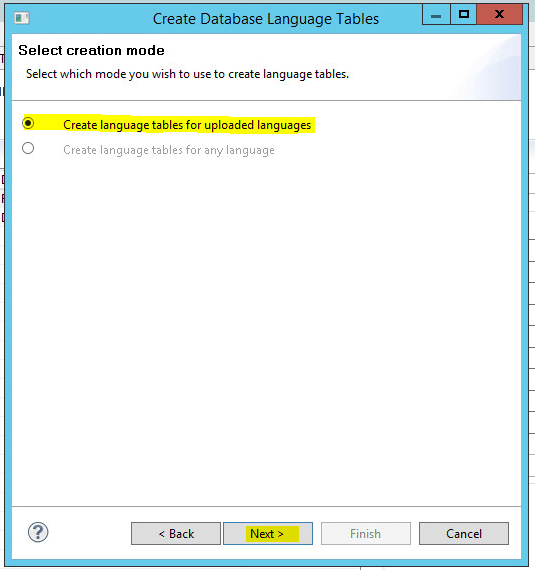
- Select Create language tables for uploaded languages and click Next
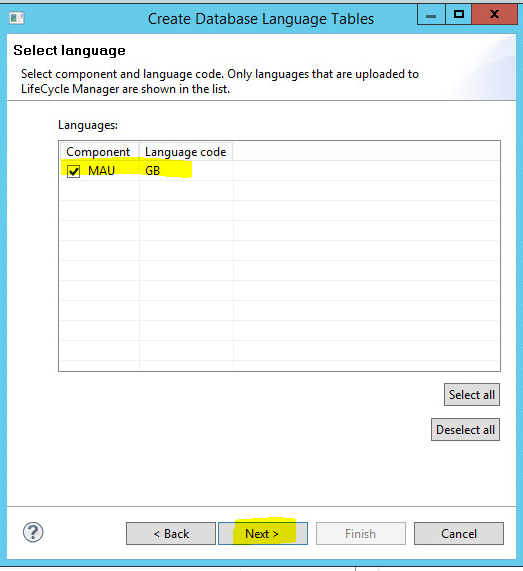
- Select the two components MVX, MAU and click Next

- Select MAU and then click Next
- Click Finish

- Click OK


- Enter in the MDBADM password
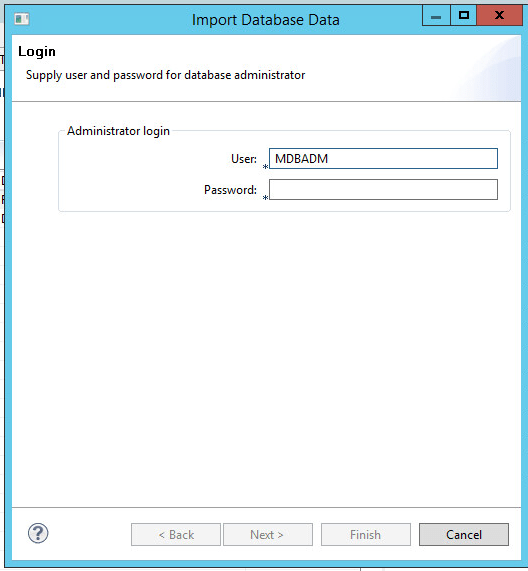
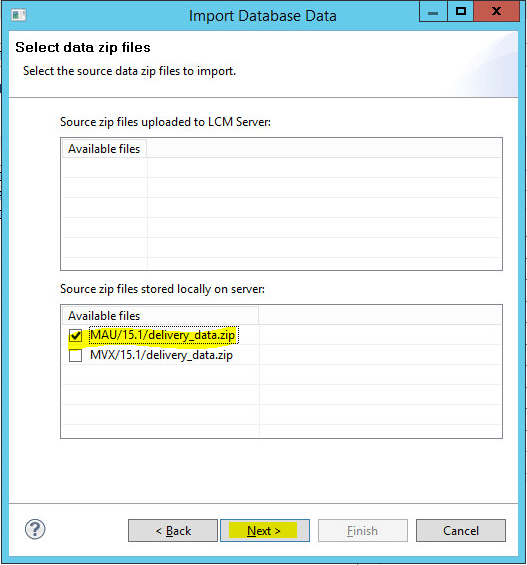
- Import Database Data and click Next

- Select the MAU file to import and click Next
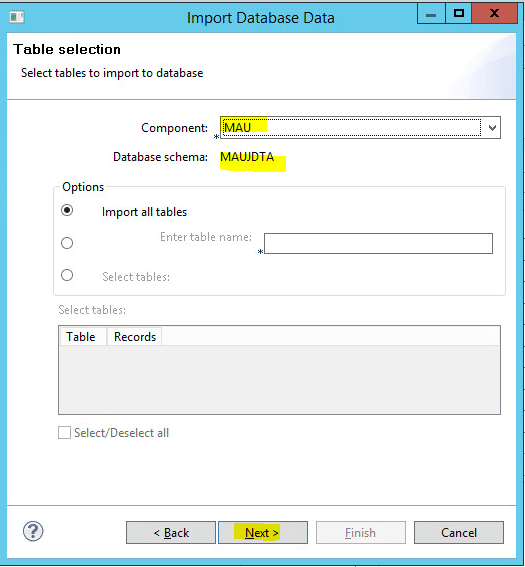
- Change the Component so it is our regional modification and click Next
- We will replace the existing records, click Next
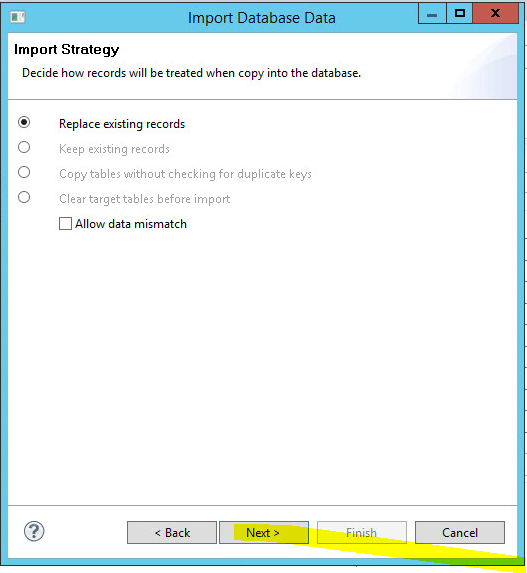
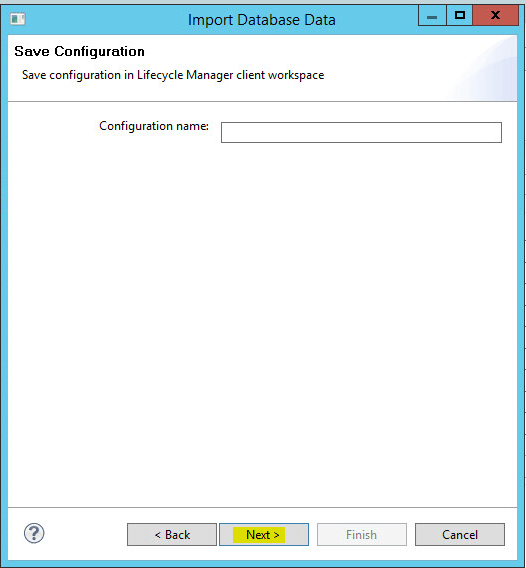
- Click Next
Install Grid Extensions
– this is for the LDAP Session Provider, GDBC, Event Hub
- In LCM -> Admin -> Upload Products. Click Upload
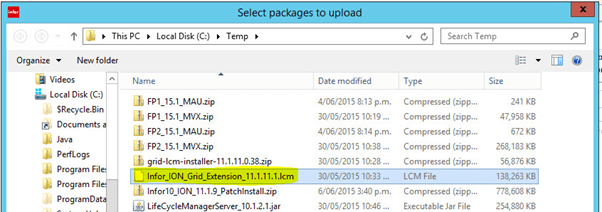
- Accept the cert

- Click OK

- Click Yes

- Click OK

Install GDBC
- LCM -> Right Click Test Grid -> Install Product
- Select GDBC and click Next
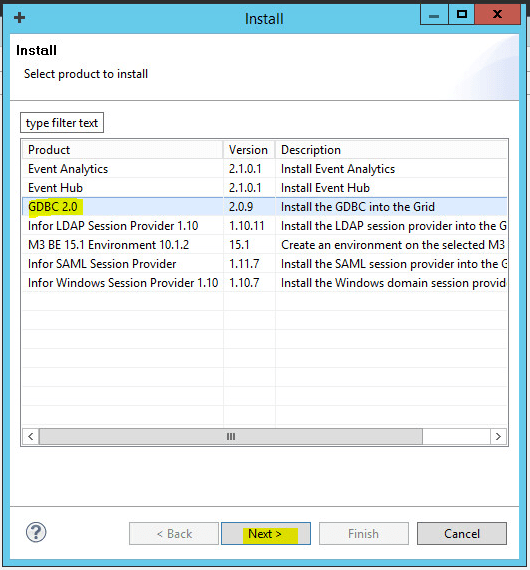
- Click Next
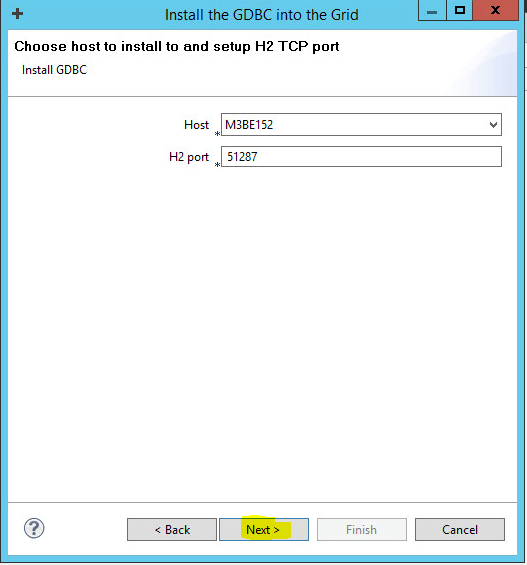
- Click Finish
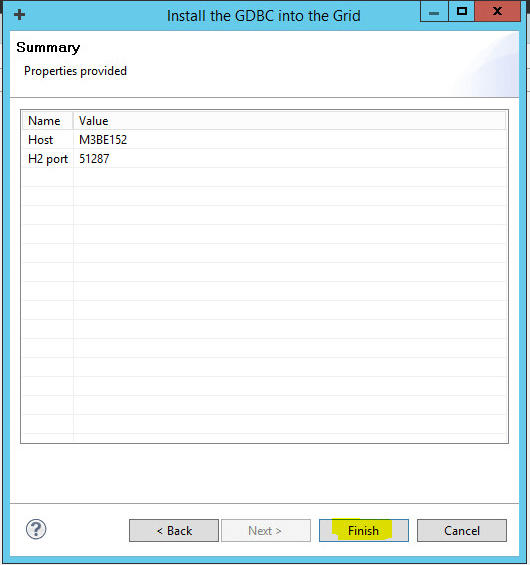
-
Click OK
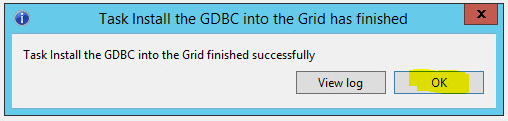
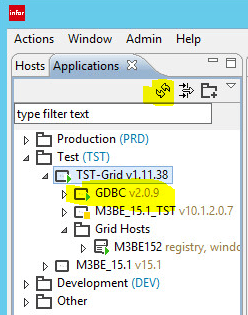
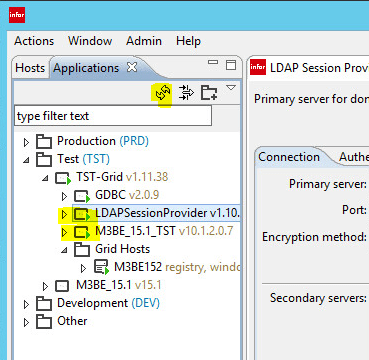
- Refresh LCM and we should see GDBC and it should be running
Install the LDAP Session Provider
- LCM -> Right Click Test Grid -> Install Product
- Select Infor LDAP Session Provider
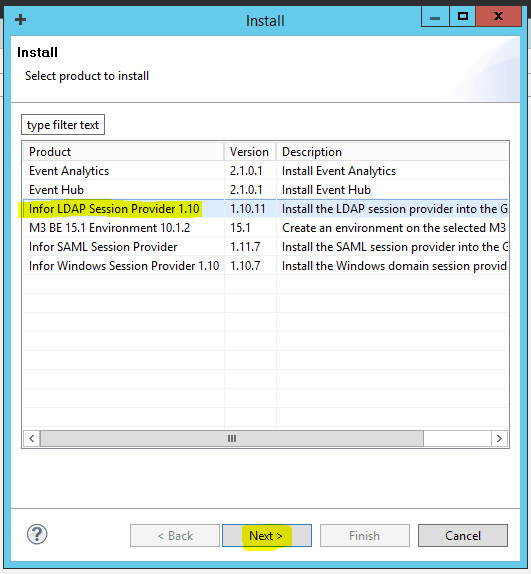
- Click Next

- Click Next
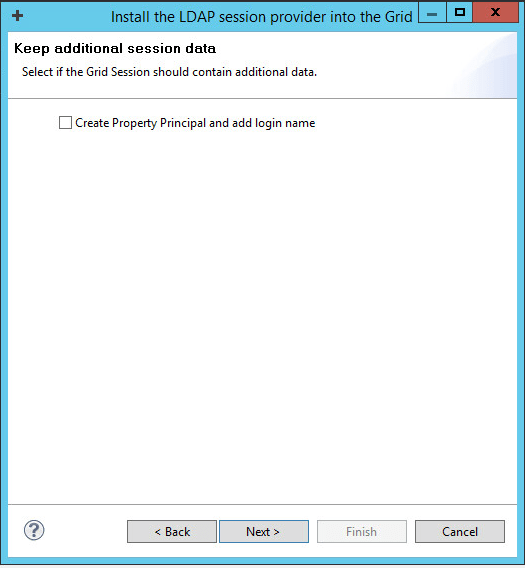
- Click Finish
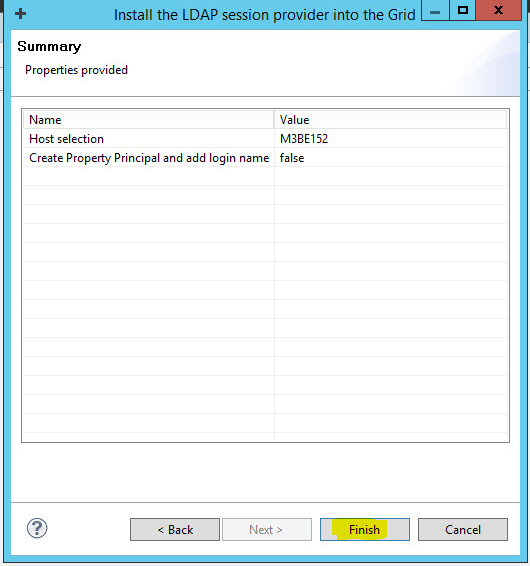
- Click OK

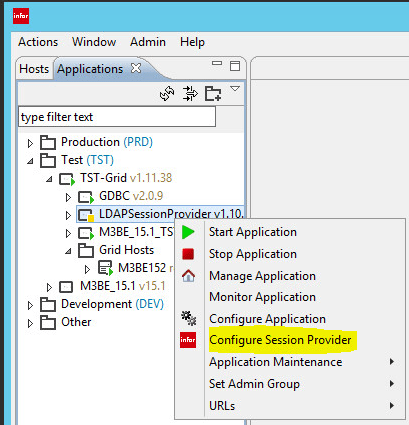
- Right Click LDAP Session Provider and select Configure Session Provider
- Point to our LDAP server – as this is a test network, I’m not encrypting our connection – but in anything outside of a close test network we should.
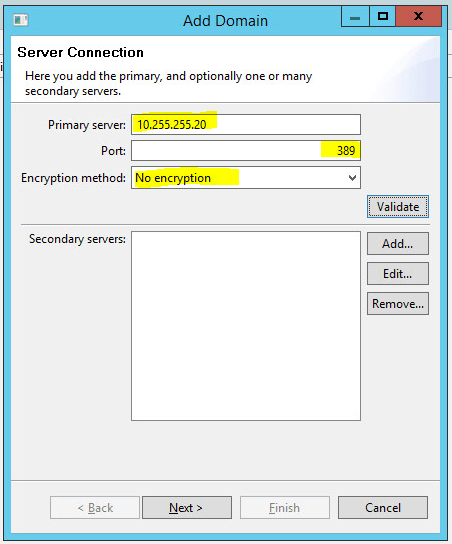
- Click on Validate to test our connection
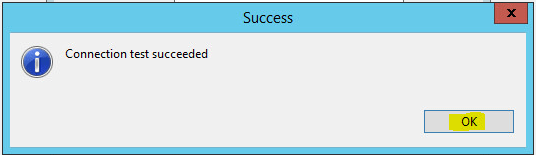
- Click Next
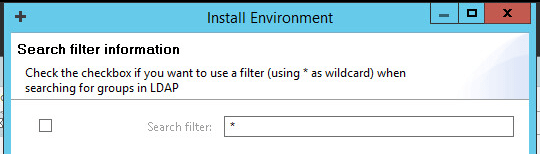
- Enter the username/password and search base
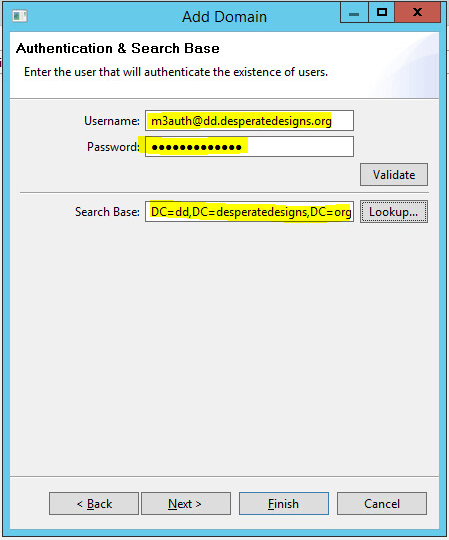
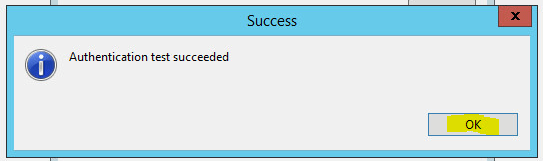
- Click Validate to test the authentication details
- Click OK
- Click Next
- Add the base location where we have our users
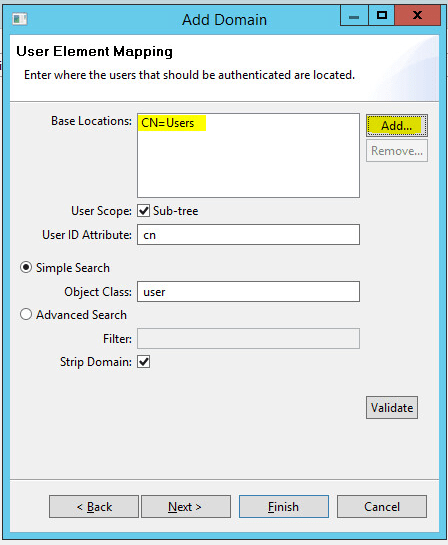
- Click Validate – we should see the users in that context

- Click Next
- Add the location for our groups

- Click Validate
- We should see a group from the context. Click Close

- Click Next
- For the display name, we will use the default attribute of displayName
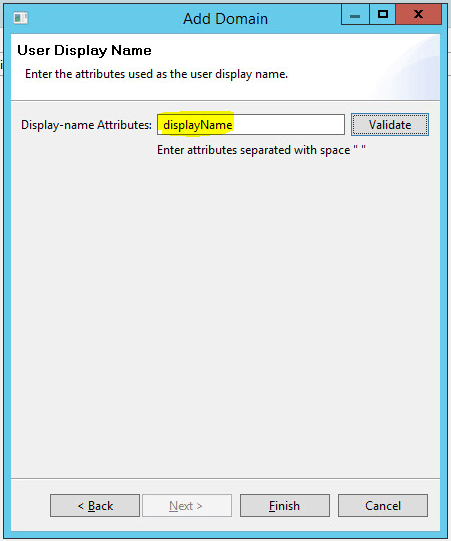
- Click Validate
- Enter the name of a user in the context you pointed the LDAP Session Provider at and click Validate
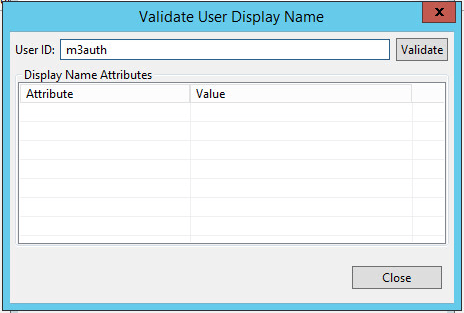
- We should get a result. Click Close

- Click Finish

- Click On Save, to save our settings

- Refresh our Test hierarchy and you should see that the LDAP Session Provider is green aswell as the M3BE
Upload our Client Tools
Files
M3_H5_Client_Enterprise_10.2.2.0_LCM10.zip
M3_UI_Adapter_10.2.2.0_LCM10.zip
InforSmartOffice_1020_LCM10.zip
- Unzip InforSmartOffice_1020_LCM10.zip
- LCM -> Admin -> Upload Products, Click Upload
- Select our two packages: M3_H5_Client_Enterprise_10.2.2.0_LCM10.zip, M3_UI_Adapter_10.2.2.0_LCM10.zip
and Click OK

- LCM -> Admin -> Upload Products, Click Upload
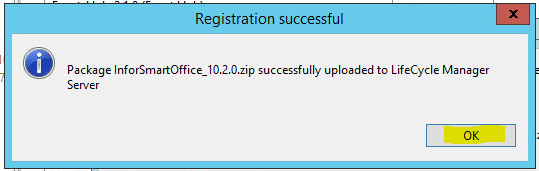
- Browse to the extracted InforSmartOffice_1020_LCM10 -> Server -> InforSmartOffice_10.2.0.zip
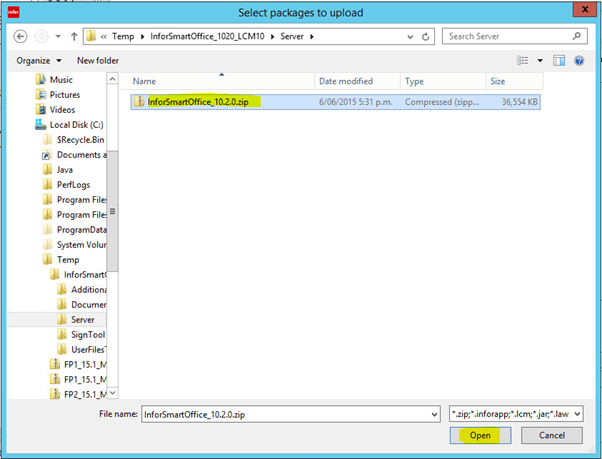
- Click Yes to accept the certs
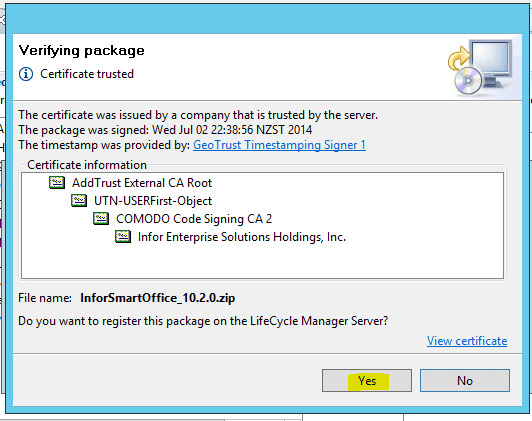
- Click OK
- Click Yes
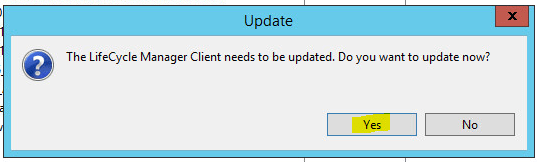
- Click OK

Install the M3UI Adapter
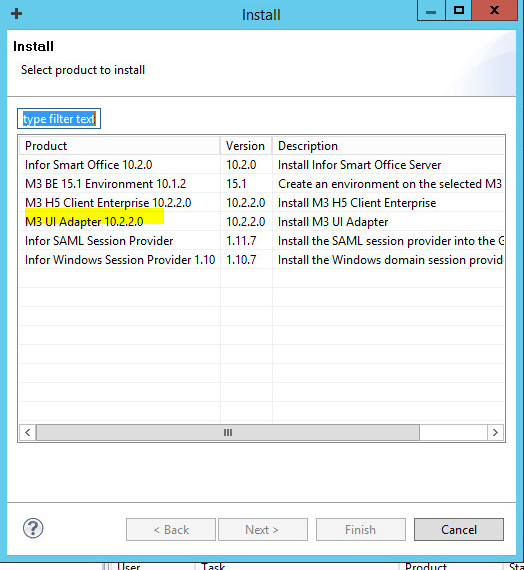
- LCM -> righ click on our grid -> Install Product

- Select M3 UI Adapter 10.2.2.0 and click Next
- Click Next
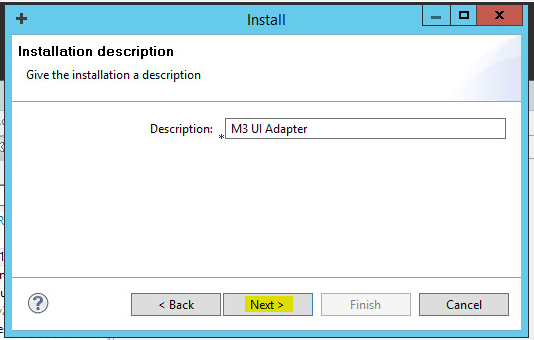
- Click Next

- Enter a directory for the fileroot
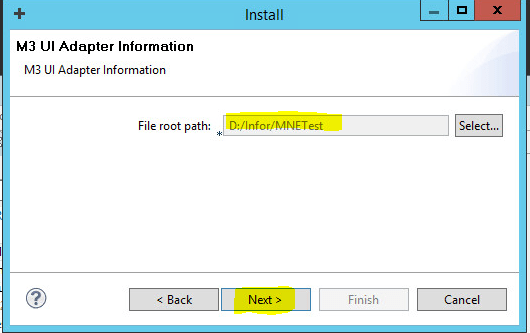
- Click Finish
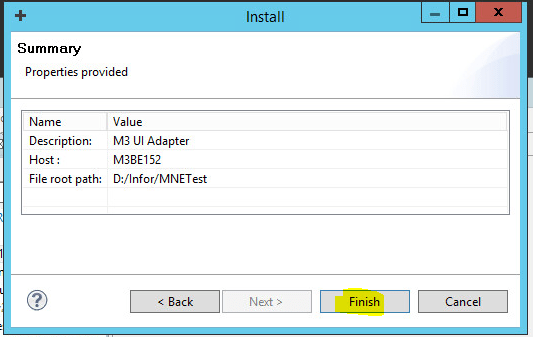
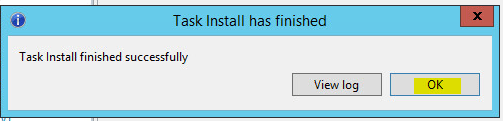
- Click OK
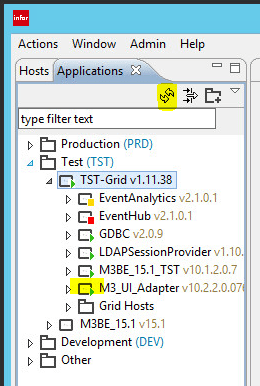
- Click on Refresh and we should have the M3 UI Adapter and it should be running
Install the Enterprise Client
Note in some versions of Enterprise search, you’ll need to edit the M3_H5_Client_Enterprise/app-user so it is set to authenticated
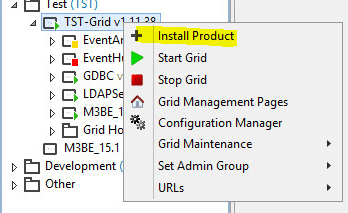
- LCM -> righ click on our grid -> Install Product

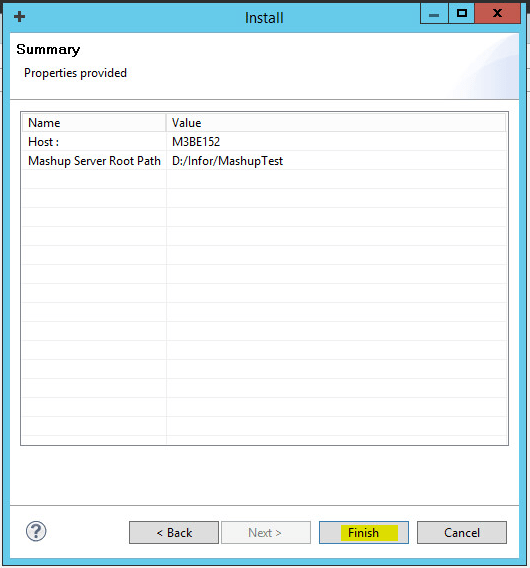
- Select M3 H5 Client Enterprise and click Next
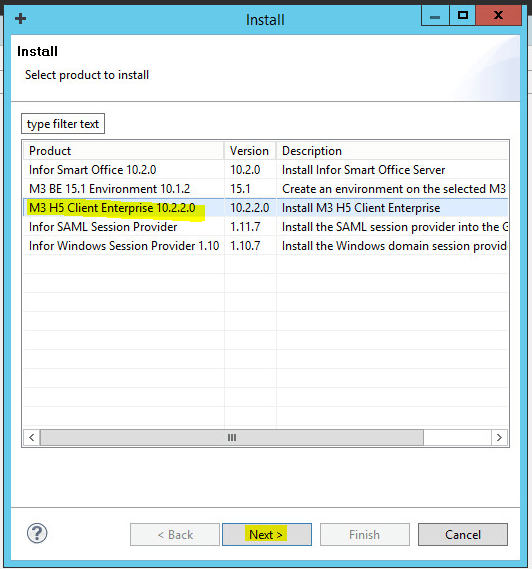
- Select a path for the Mashups and click Next

- Click Finish
- Click OK

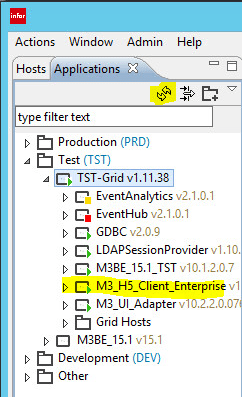
- Click Refresh and we should see the M3 H5 Client Enterprise running
Install Mango Server
We should set Internet Explorers security to medium low before we start and add our server to IEs trusted list.
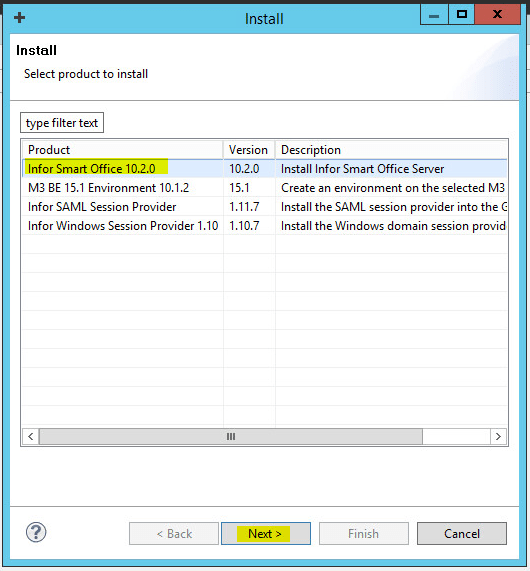
- LCM -> righ click on our grid -> Install Product
- Select Infor Smart Office and then click Next
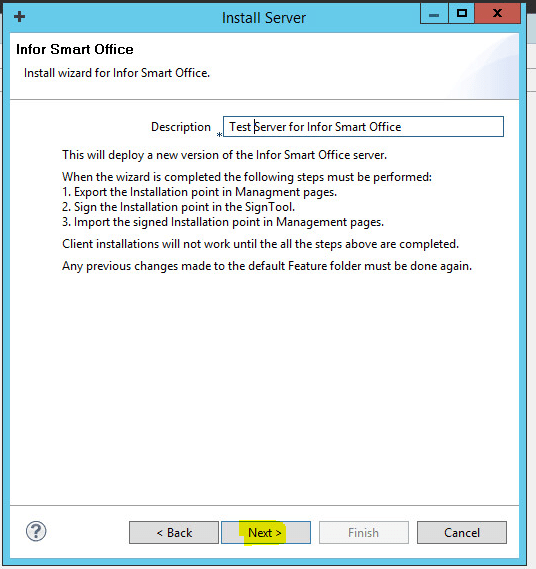
- Click Next
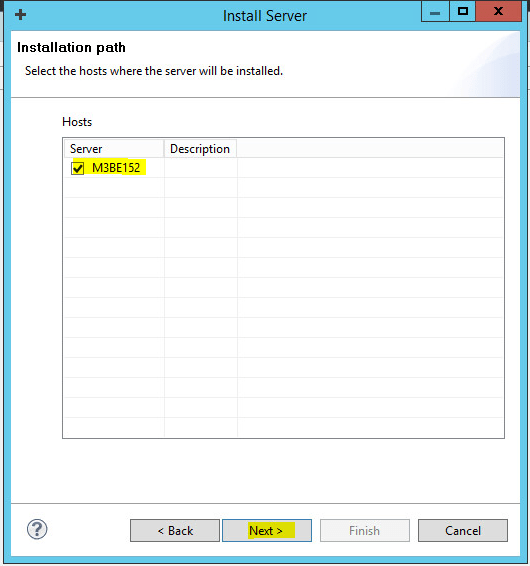
- Select the server we want to install it on and click Next
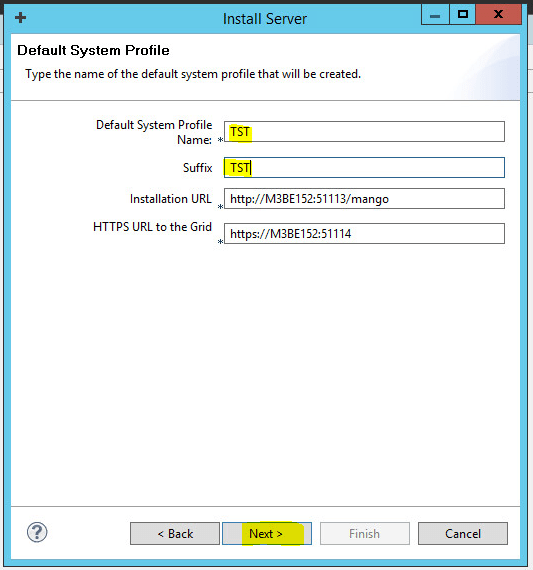
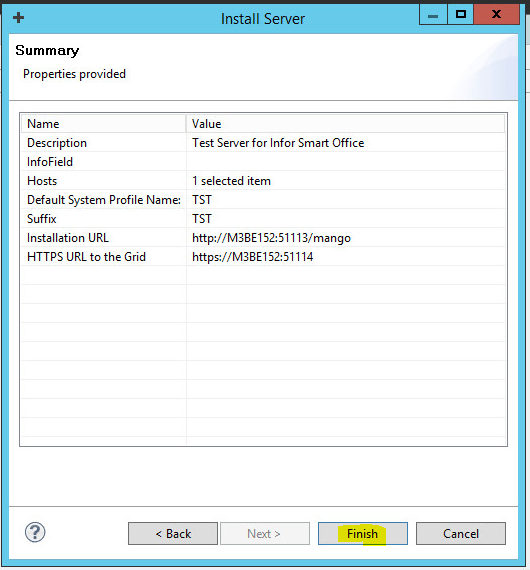
- Set the Default System Profile, and Suffix and click Next
- Click Finish
- Click OK
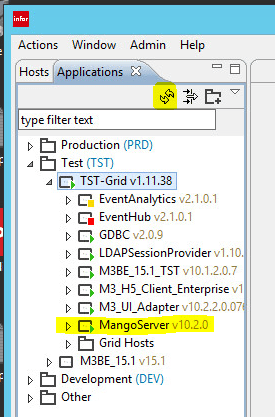
- Refresh our LCM tree and we should see MangoServer running
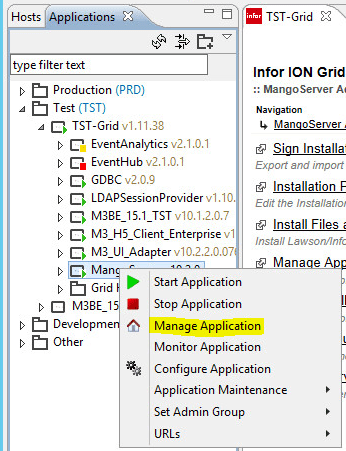
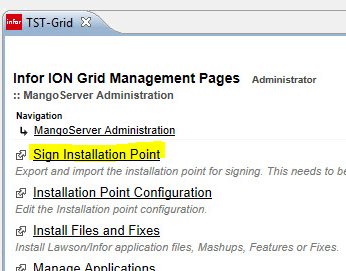
- Right Click on the MangoServer and select Sign Installation Point
- Click Sign Installation Point
- Click on Export
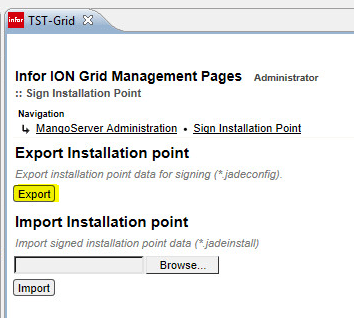
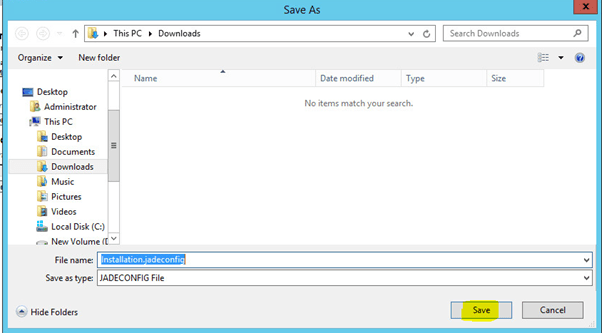
- Save the installation point

- Click Save
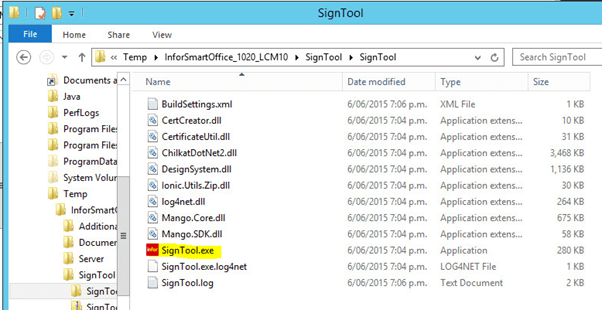
- Go to where you extracted the InforSmartOffice_1020_LCM10.zip, go to the SignTool and unzip it
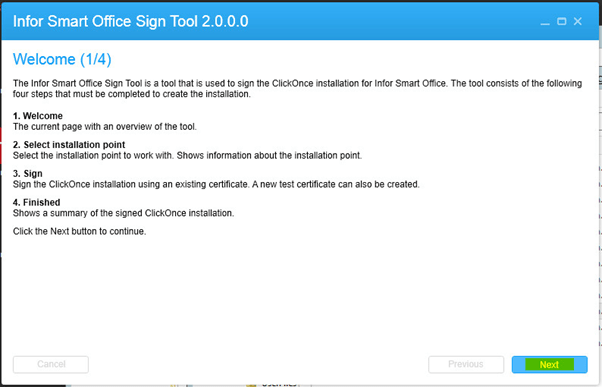
- Go in to the SignTool folder and run SignTool.exe
- Click Next
- Browse to the location where you exported the MangoServer to
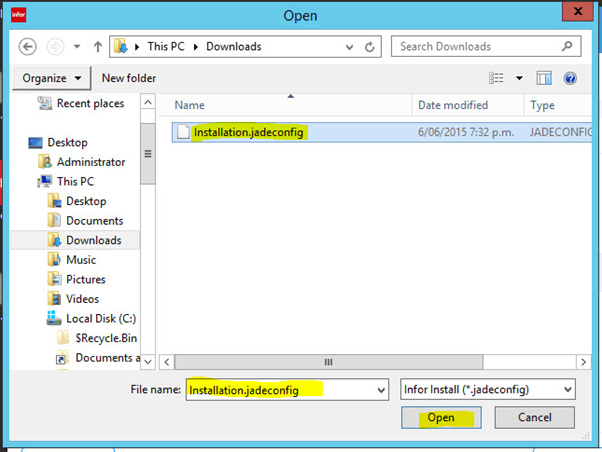
- Click Next
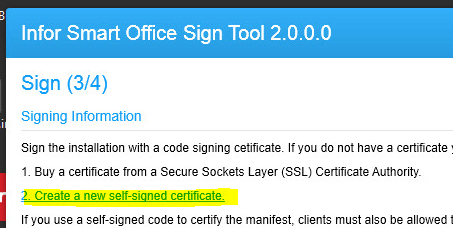
- Click Create a new self-signed certificate
- Specify a name, password and location to create the cert
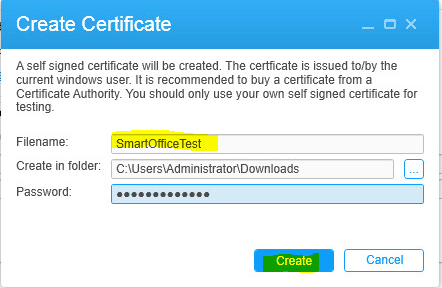
- Click Next

- Click Finish
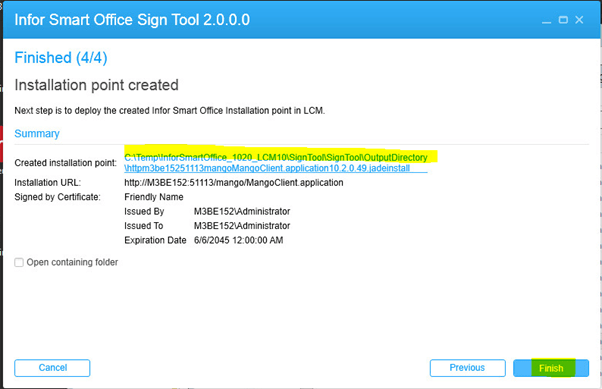
Note the directory it’s exported to - In LCM right Click on the MangoServer and select Sign Installation Point

- Click Sign Installation Point

- Click on Sign Installation Point
- Click on Browse
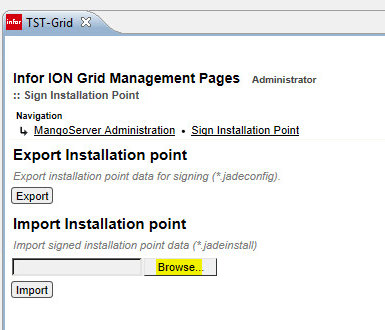
- Locate the export directory
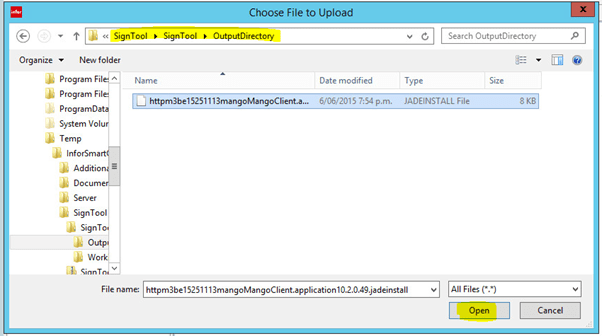
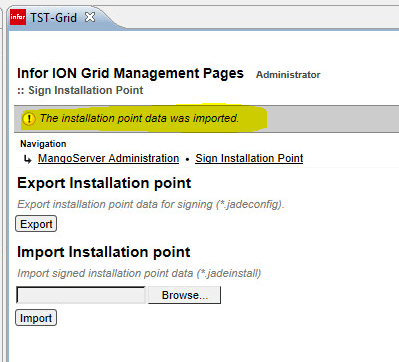
- Click on Import
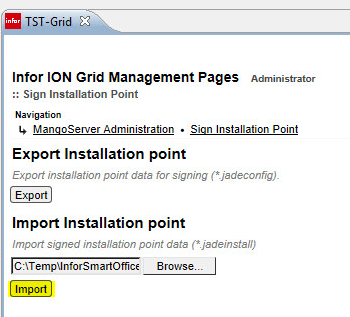
- Click on OK

- And you should see the Installation Point was imported message
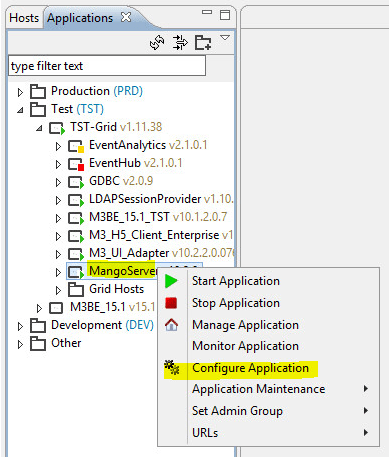
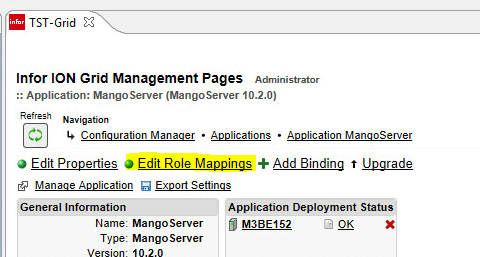
- Right Click on the MangoServer application and select Configure Application
- Click Edit Role Mappings
- Click on Edit beside Administrator
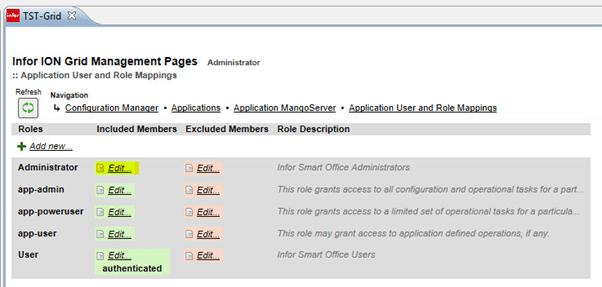
- Click Add
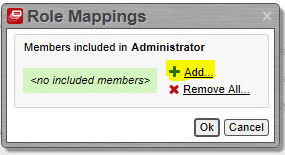
- Add users as Administrators to Smart Office (Administrator and m3srvadm)
- Click OK

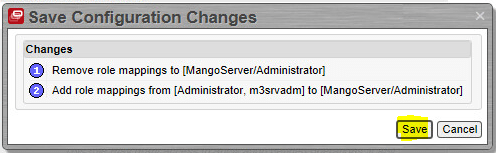
- Click Save
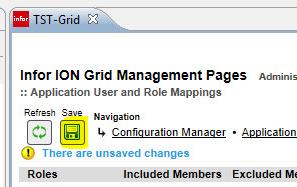
- Click Save
- Repeat for app-admin
Install the Smart Office Client
- Browse to our install location

- Click Install

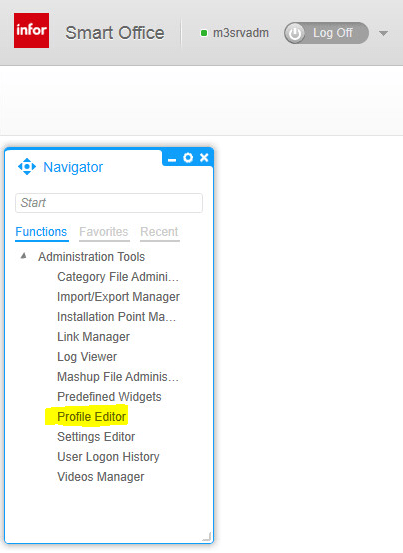
- Log in to Smart Office with one of the users that you added to the Administrator role above
- Administration Tools -> Profile Editor
- Click on Advanced

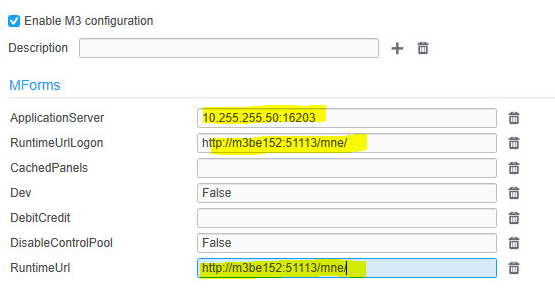
- Go down to M3 and enable the M3 Configuration
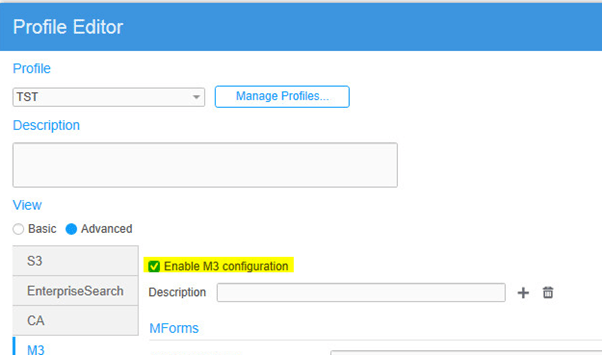
-
Scroll down to the MForms section
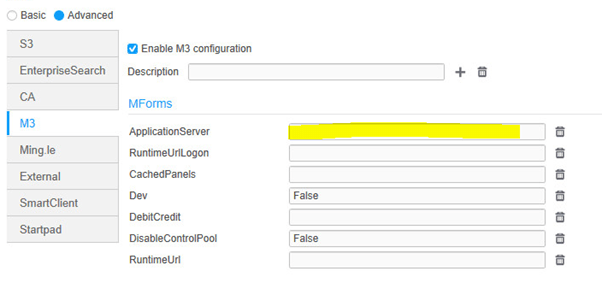
- The Application Server can be determined by going. Right click on the M3BE and select Configure Application
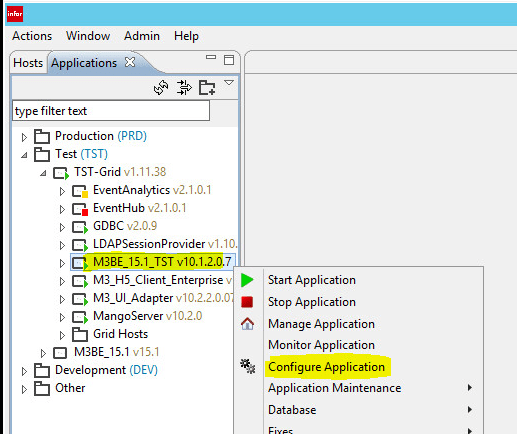
Scroll down to Connection Dispatchers
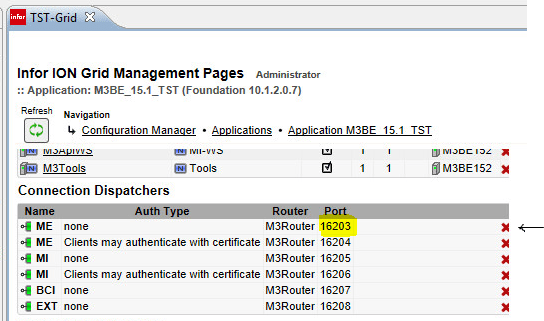
So we will use 10.255.255.50:16203 (10.255.255.50 is the IP of our address) -
RuntimeURLLogon can be determined by going to the default router.
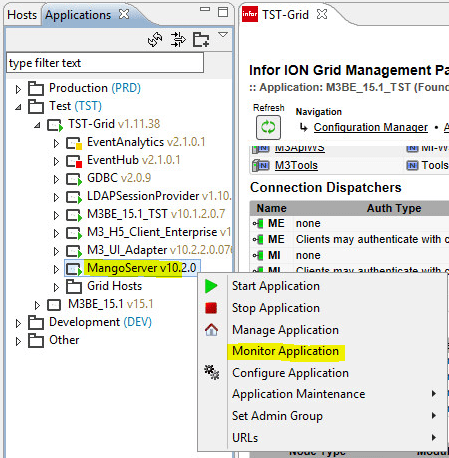
Right click on the MangoServer and select Monitor Application
Click on Web Components

In the Web Routers section make note of the HTTP Port.

In IE, enter our servers IP Address and port

which will redirect you to /grid/info.html
Scroll down to the mne section

The highlighted section is our RuntimeUrlLogon and RuntimeUrl
It should look something like this:
- Click Save

- Click Next
- Close Smart Office
- The Application Server can be determined by going. Right click on the M3BE and select Configure Application
Testing M3 Login
Now we should run Smart Office to test our setup. Note, in your authentication source you must have mvxsecofr set up with a username/password.
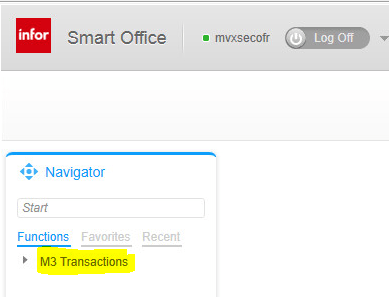
- Login to Smart Office as mvxsecofr (this is one of the automatically deployed users)
- We should see the menus / M3 Transactions in Navigator
- We can now create other users
Install the Feature Packs
We’ve already uploaded them to LCM, now we will install them
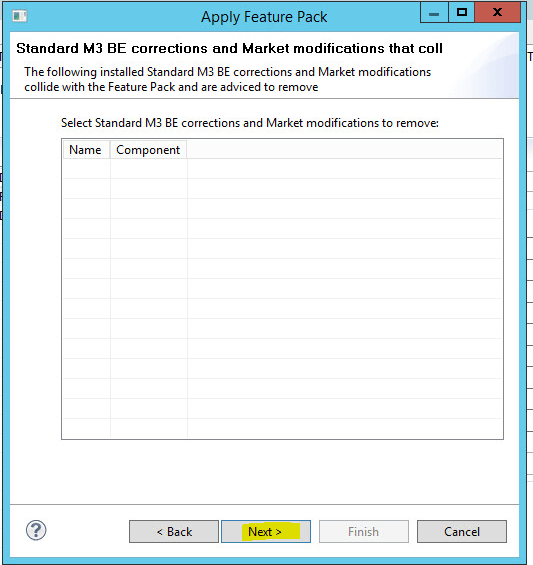
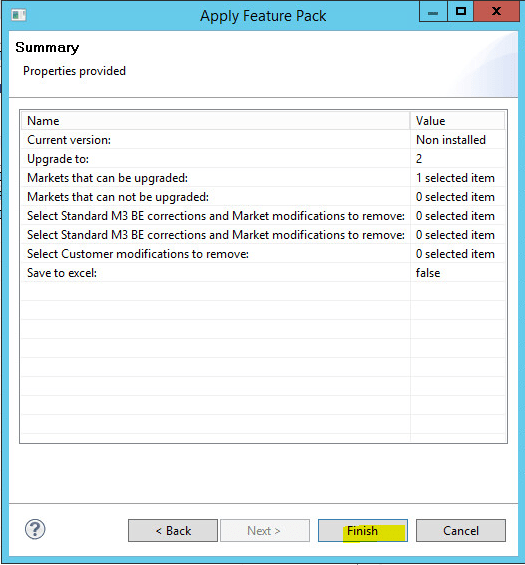
- Right click on the M3BE_15.1_TST -> Fixes -> Apply Feature Pack
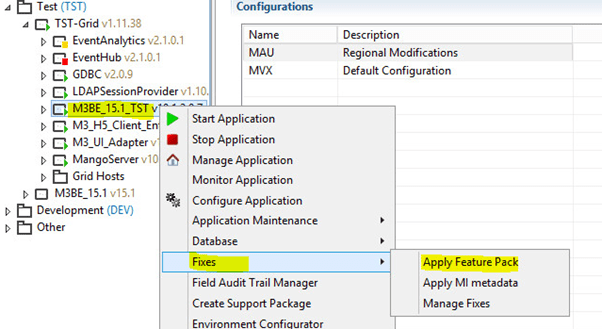
- We have feature pack 2 to install, so select 2, and put a tick in our regional mods (MAU), click Next

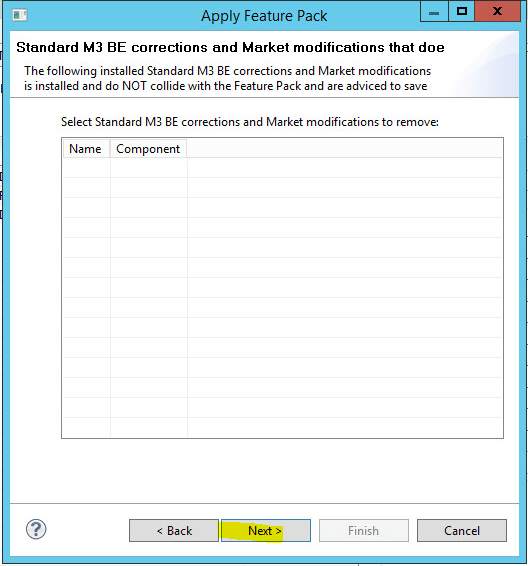
- Click Next
- Click Next
- Click Next
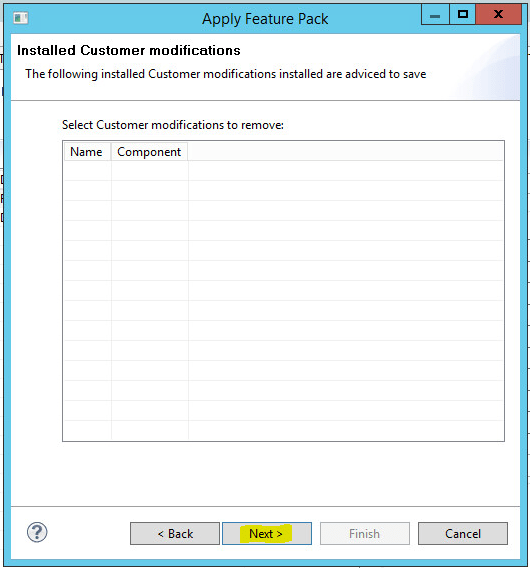
- Click Next
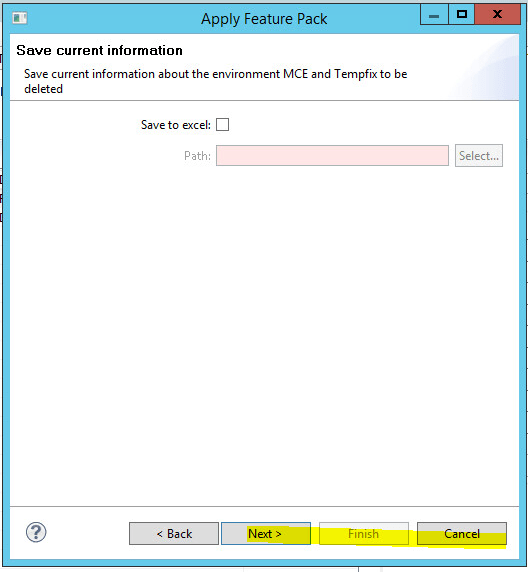
- Click Finish
- Click OK
- Click Details
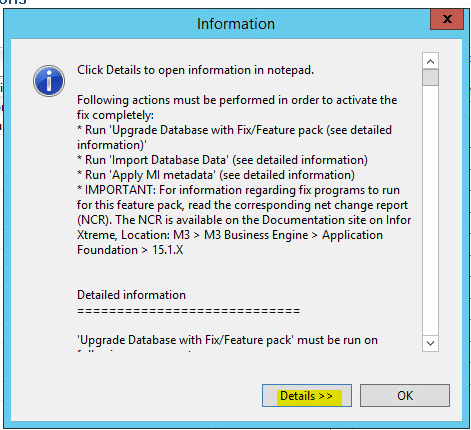
- Run through the fixes that are required in the details

-
Run the Upgrade Database

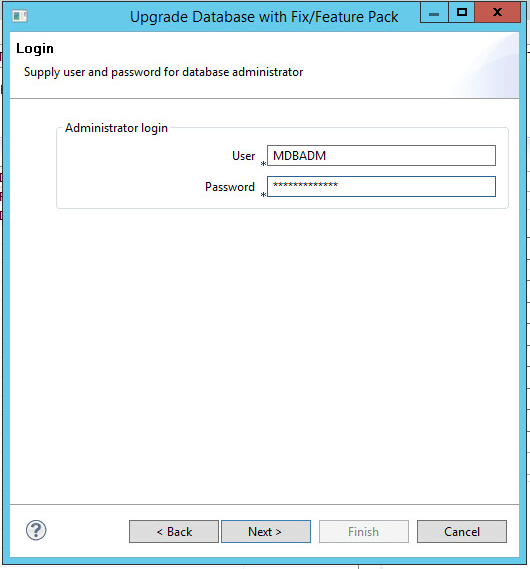
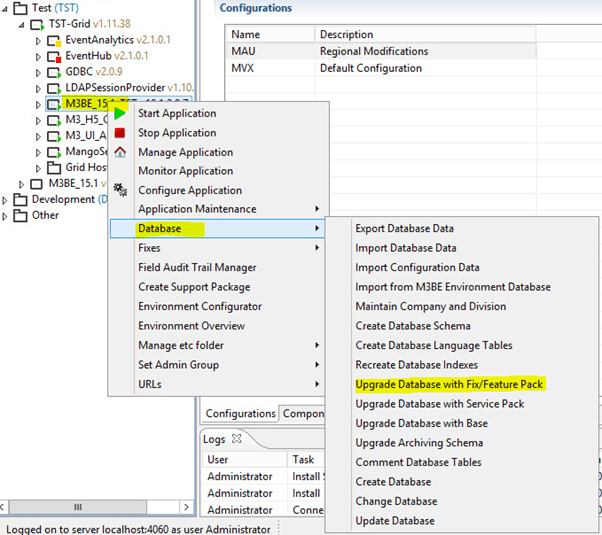
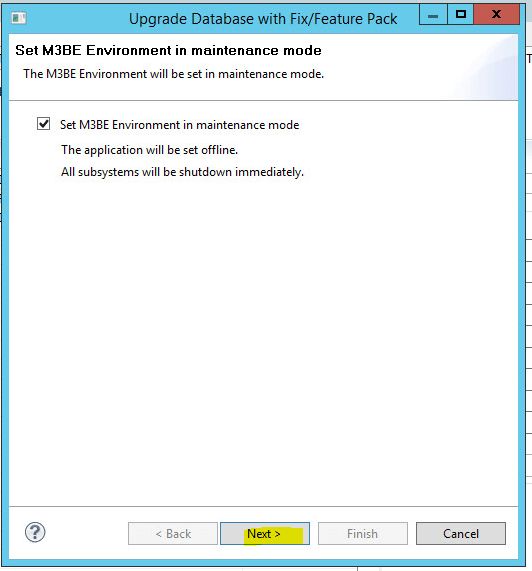
- Right Click on our BE, Select Database -> Upgrade Database with Fix/Feature Pack

- Click Next

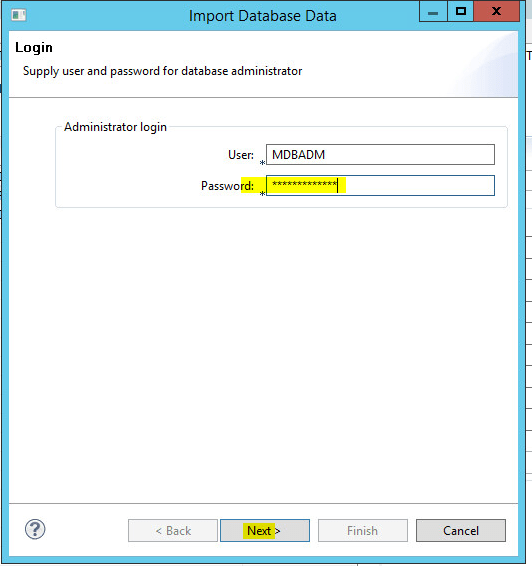
- Enter your mdbadm password and click Next
- Click Next
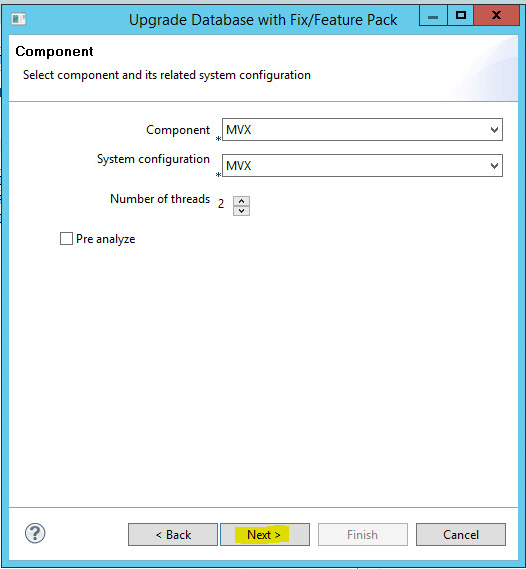
- Click Finish

- Because we have market mods, we need to repeat the steps with the market mods
Right Click on our BE, Select Database -> Upgrade Database with Fix/Feature Pack
- Click Next
- Enter your mdbadm password and click Next

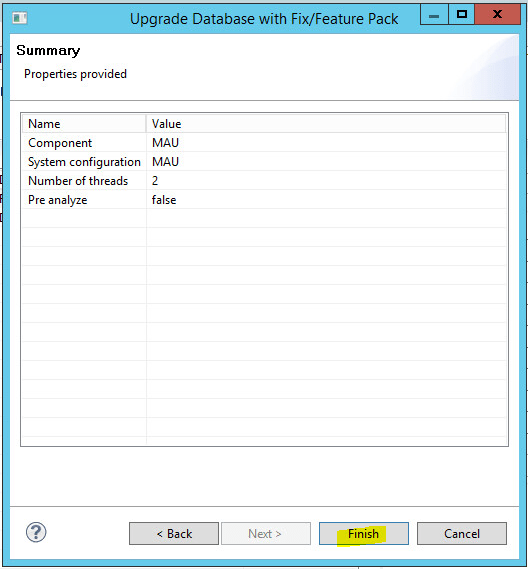
- Change the component to MAU – the system configuration will change to MAU automatically. Click Next
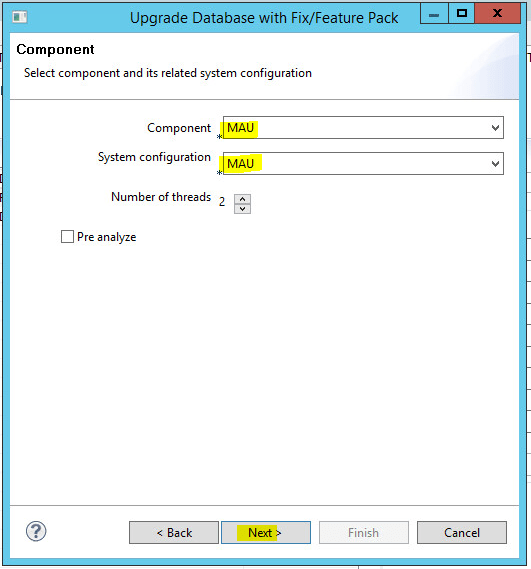
- Click Finish
- Right Click on our BE, Select Database -> Upgrade Database with Fix/Feature Pack
-
Import Database Data

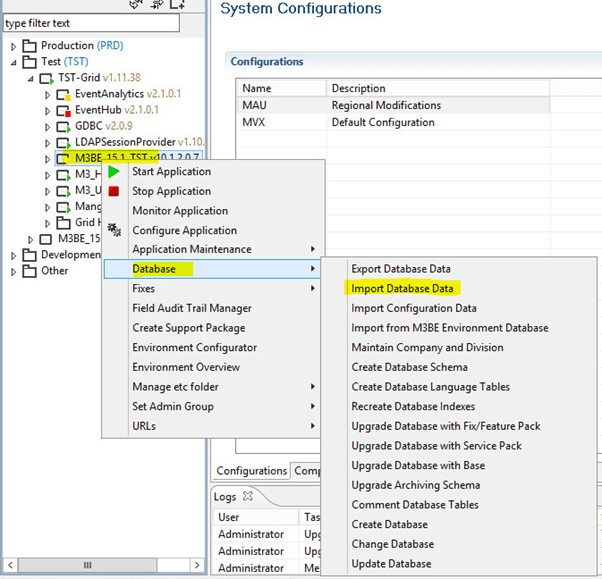
- Right Click our M3BE -> Database -> Import Database Data
- Enter our database password and click Next
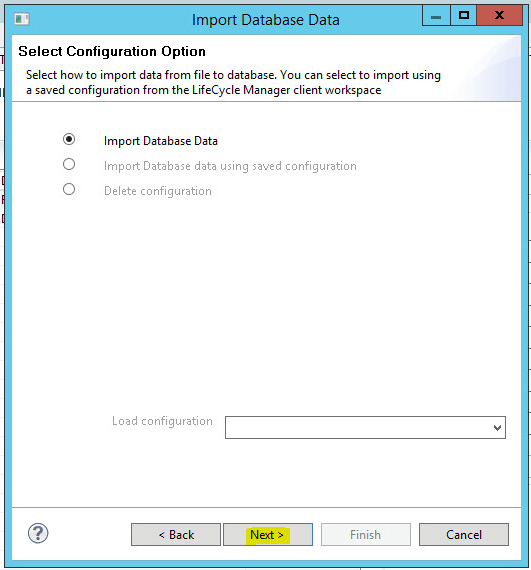
- Click Next
- Select the fixes listed in the details section from earlier
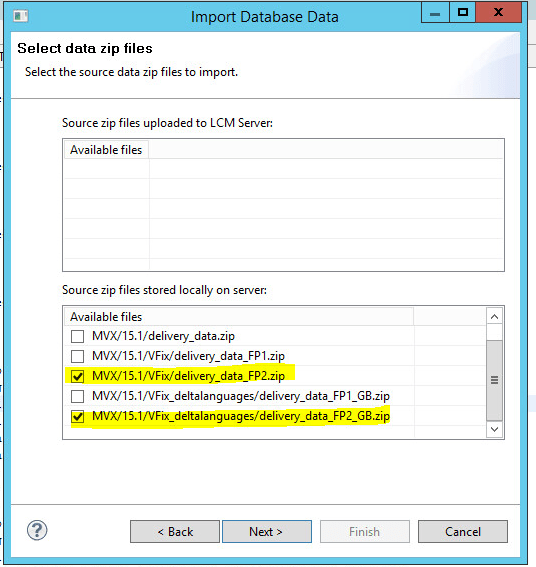
- There was no MAU, so we are only going to be doing the MVX
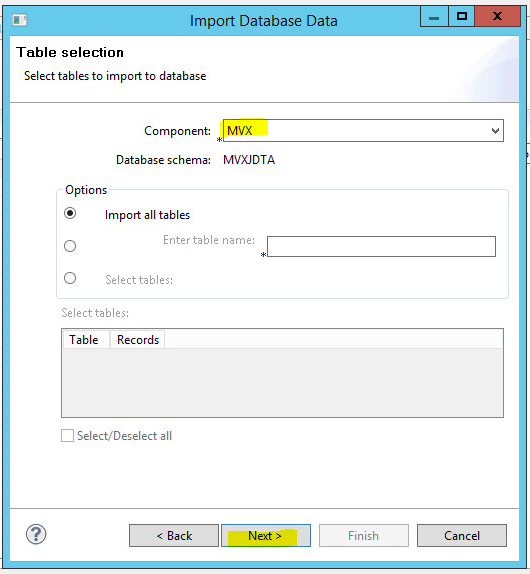
- Click Next
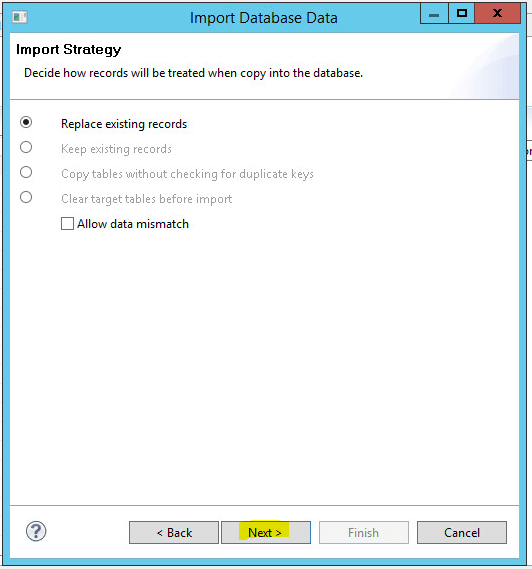
The names of what we are deploying implies we could just do a clear tables, but I’ll stick with a replace - Click Next

- Click Finish

- Click OK
 Note, I did originally try importing the FP1 data aswell which resulted in CMNFNG layout mismatches. So on the second attempt I only did the FP2 data which succeeded.
- Right Click our M3BE -> Database -> Import Database Data
-
Apply MI metadata
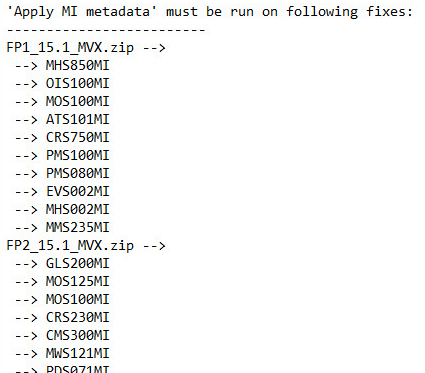
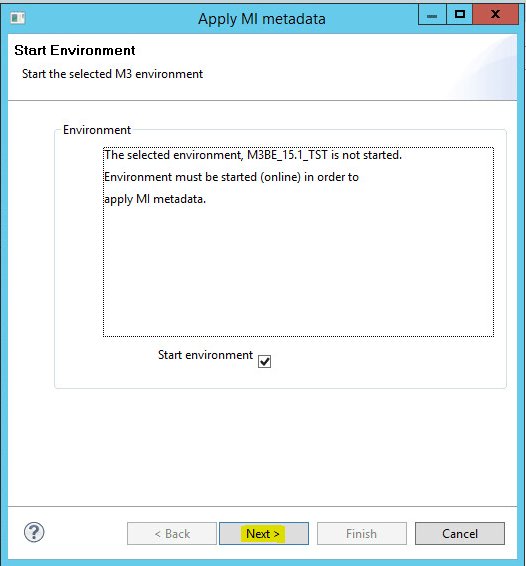
- Right click on the M3BE -> Fixes -> Apply MI metadata
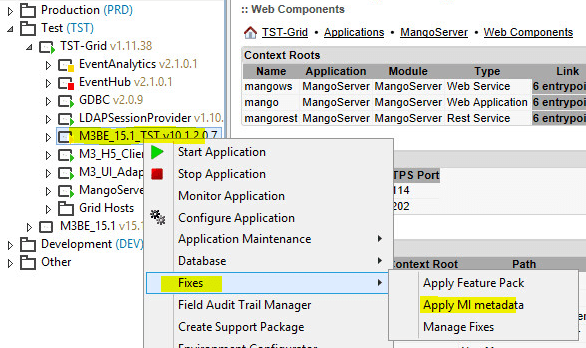
- Click Next
- Enter a M3 username/password
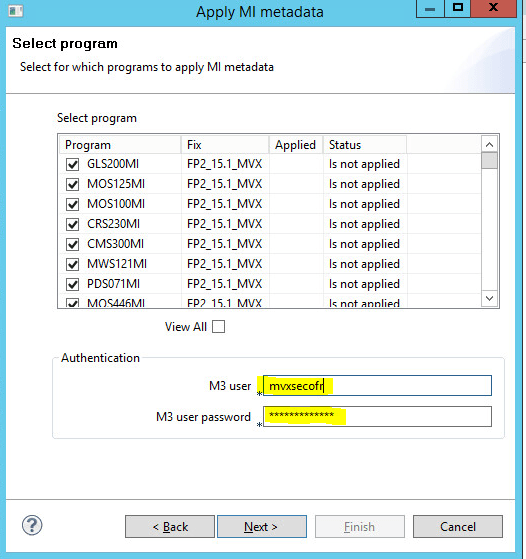
- Click Finish
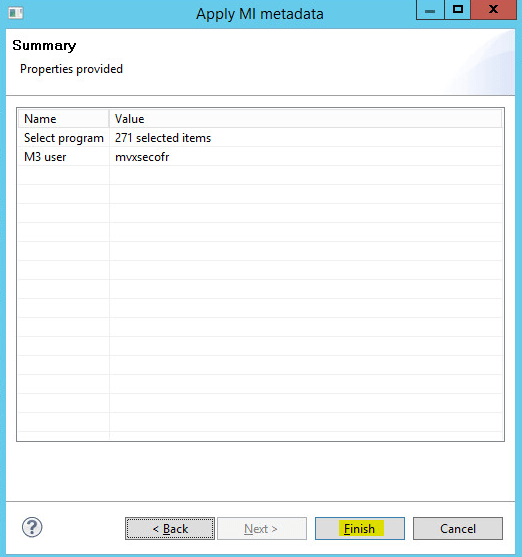
- Click on OK
- Right click on the M3BE -> Fixes -> Apply MI metadata
And there we have it – a basic M3 environment up and running.
And if we start Smart Office and run a quick script:

We can see our BE is version 15.1.2

Going to a 15.1.3 install is as simple as applying the FP3_15.1_MAU.zip and FP3_15.1_MVX.zip which I will document soon.

Great detailed explanation.
We are new to M3. Though we have worked on SAP and JDA. We tried installing M3 Followed the steps as mentioned in “M3 Core Installation PlanningGuide – Windows.pdf” and “M3 Core Installation Guide -Windows.pdf” But were unsuccessful. On 2 separate installation we got 2 different errors. 1. “Application Server is not available though on webapplication page we can see all services are running and up with OK.
The other instance we got error “User profile not found.”
We did not install LDAP but using LCM configured AD LDAP and install Windows session manager.
Version used : M3-13.2 and M-13.3
Many thanks in advance.
Regards
Vikas Sharma
Hi Vikas,
one of the reasons that I have documented the steps in this way is because there are quick a few steps. Missing one or two can result in oddities.
Without knowing the specifics, I’d struggle to even guess what could be wrong or what parts of your install aren’t working correctly.
Specifically where do you see the errors?
Thanks for reply,
We get this error when we try to access H5 in browser. Also if integrate the same instance in the ming.le the error is same.
We try to run a fresh installation as per your documentation except we did not use LDAP. but no luck looks like we are missing some point.
Thanks.
If I log in to the H5 client with a user that isn’t set up within M3 (MNS150) then I get: “The application server is currently not available”
So you need to set that user up.
Initial logins on a clean new environment, you need to log in as mvxsecofr (this user needs to be set up in your authentication source). With mvxsecofr you will be able to run programs and be able to create other users.
You can see the users that are delivered by looking in the table CMNUSR
Cheers,
Scott
Great Scott. Many thanks. My problem mentioned above “App server Not found” is solved now by the solution you gave.
It is bit strange, none of the documentation says one needs to setup mvxsecofr User in AD. and use it to login.
Thanks again.
Vikas Sharma
Hi Vikas,
I’m glad I wasn’t the only one that didn’t see it (but I am prone to skipping boring parts of documentation :-)).
The documentation I have found has been getting better but there are still holes.
Cheers,
Scott
Hi Scott, great many screenshots, I miss those from the Infor docs. Have you explored installing M3 on AWS, or on Linux?
I got Independent Fisheries M3 moved to AWS under Infors Upgrade-X. So it definitely works and works well from a performance perspective.
I’ve been considering giving a Linux install a shot but I’m a little wary. The documentation can be vague and unless you have the specific flavours of the Linux OS you can quickly end up in a world of hurt.
For cross-reference, I finally tried installing the Infor ION Grid (just that one component for now) on Linux, see https://m3ideas.org/2017/06/13/building-an-infor-grid-lab-part-6bis/
Looking forward to your experience in updating this environment to 13.3. Please read the documentation prior that since there are numerous changes to product to be downloaded as well as the process in doing it.
Thank you for the heads up Magnus.
Hi Scott,
Thanks for great documentation. I was able to create my test lab using steps mentioned by you.
I have some questions:
1. Is there any way to create M3 login for user whose AD ID is more than 10 characters?
2. Right now after installation i can see all options but all data is empty companies, customers etc. I can see which is due to no company present.Is there a way to get some test data loaded in M3 for practice?
Thanks in advance
Hi Nikhil,
1. unfortunately not as far as I am aware. The only thing that I can think of that you could do to allow staff with usernames that are longer than 10 characters is to use a different attribute from the cn in the LDAP setup. So you could use the comments field for example and have the users truncated username. This unfortunately means that your user will have a different username than that that use to log in to their computer and it means that you will need to populate this field for everyone. I am actually looking at using this technique for IFL as I transition them from their existing usernaming convention to something more consistent.
2. If you have access to Quick Step (?) then that will populate some base data, or depending on where your lab is set up you can import a copy of your companies database. As far as I am aware, Infor don’t provide a generic testing configuration – it’d be nice but…
Cheers,
Scott
Scott — this makes me want to come back to M3 World 🙂 — Awesome documentation and examples
Perhaps you should! I feel that M3 has come a long way in recent years. It’s not perfect, but it doesn’t feel like the BE is stagnating. And there are some pretty kewl technologies that sit around M3 now too…
hi ,
What is the minimum Server requirement to install M3 Lab ?
CPU , RAM
Thank you
It depends on what you want to achieve.
For this proof of concept, if memory serves I had about 30gig of RAM in total in my physical server. But I wouldn’t do serious testing on that.
The installation documents in InforXtreme have minimum requirements – you should use them as a guide. Also, there is no tuning or best practices applied to my install – there are guides available on InforXtreme.
I am doing a fresh install and went through your steps, but if I try to manage an application through LCM the grid page says <not logged in> [login] at the bottom of the screen and doesn’t allow me to make any administrator changes. I ran AdminUI.cmd to log in as the bootstrap user and added my username but to no avail. Is there a step I am missing to get the Grid Management pages to see my login?