
When I recently looked at upgrading Smart Office from version 10.0.5.x to 10.1.x I was rather concerned about a couple of the steps and really wanted to be able to test the install in a completely isolated environment. Unfortunately, at work I wasn’t going to be able to do so – I’d always be relying on either our DR AS400 or my production AS400. Neither situation is ideal.
So I had considered building my own test lab in an isolated environment. As it happens I have my very own HP DL380g4 sitting at home and have VMware ESXi 5.1 sitting on it – this server is what I tend to test upgrades of VMware, or our email system on amongst other things. A few months ago, I increased the ram on the unit from 14gig up to 50gig for the purpose of trying to build a M3 lab. It’s really quite amazing what sort of kit that you can purchase now at such a low price.
I had a chat to the NZ Infor Techy about running through an install from wo-to-go with me, however due to some proposed restructuring I came to the conclusion that I’ll be lucky alone get budget for something that could be considered rather frivolous.
But, me being me, I really wanted to see if I could do it and I was kinda interested to learn about how everything would hang together, de-mystifying M3 if you will. And of-course, the great thing about going it alone is that I would screw stuff up and then have to fix it – it may take longer but at least I get to make my mistakes and conclusions. And believe you me, there was definitely a lot of that.
First things first – this is a pure lab install, there is no tuning, there is no performance checking, nothing. It’s purely an exercise to learn about an M3 install, and ideally later use it to test procedures in updating various components without hosing one of my expensive work environments. There were several instances where I had to back-track, and some instances where I was a little too click-happy and skipped screenshots – I may have even skipped a step or two. I have also cleaned up this document from my 153 A4 pages of notes and screenshots – changing the order so it is a little easier to follow – so it is equally possible I have missed some steps – be prepared.
In total, there was the better part of 4-5 days working on getting this installed and running – some of that was due to getting distracted by TV or doing other work :-). I’d be fairly confident that I could reduce that significantly now that I have a better understanding.
Because there is a lot in the way of screenshots (these would have been invaluable as I was following the install guides!), I’m going to break this up in to 5 posts:
- Part 1 – Preparing the Servers, Installing SQL Server, LCM and loading the Foundational Components
- Part 2 – Installing the Business Engine, License Server and Create an Environment
- Part 3 – Installing and Creating the Grid
- Part 4 – Installing Smart Office
- Part 5 – All the fiddly bits, Regional Modifications, Autojobs
After which I had a pretty basic install against which I could test and run a few programs.
Anyways, here goes:
Reference Documents
These are the documents I used to guide me through the installation.
GRIDIG_10.1.9.0_UWA.pdf
GRIDEXTIG_10.1.9.0_UWA.pdf
M3BEIG_14.1.2.0_W.pdf
M3BEGIG_9.1.8.0_UWA.pdf
LCMIG_9.1.12.0_W.pdf
Install Files
These are the files that I will be using to build the lab.
Infor Download Portal
Grid_Extensions_10.1.9.1.lcm
InforSmartOffice_1011_LCM9.zip
Lawson_Grid_10.1.9.0.zip
LifeCycleManagerServer_9.1.12.0.msi
M3_UI_Adapter_10.2.1.1_LCM9.zip
M3APIWS_2.0.zip
M3BE_1412_MAU.zip
M3BE_1412_MAU_D.zip
M3BEGrid_9.1.8.0_2.3.0.zip
M3BusinessEngine_14.1.2.zip
M3FND14.1.2_9044.zip
M3Installation14.1.2_2.4.0.zip
M3LicenseServer2.1.1_2.2.0.zip
M3TOR14.1.2_9043.zip
Microsoft
dotNetFx40_Full_x86_x64.exe
dotnetfx45_full_x86_x64.exe
Oracle
jdk-6u21-windows-i586.exe
Servers
We will build three Windows Server servers and deploy the Business Engine, LCM and Smart Office to them. Given the dependency on DNS and not wanting to meddle with my labs DNS I will set up the DNS on one of the local servers. And because I haven’t really used LDAP on Active Directory, my LDAP datasource will be against an existing test server running Novells eDirectory.
DNS Domain: m3.desperatedesigns.org
DNS Server: 10.255.255.70
M3BE10
Designation: M3 Business Engine, MS SQL Server, DNS Server
OS: Windows Server 2008r2 sp1
IP: 10.255.255.70
M3LCM10
Designation: Life Cycle Manager Server
OS: Windows Server 2008r2 sp1
IP: 10.255.255.71
M3ISO10
Designation: Smart Office Server
OS: Windows Server 2008r2 sp1
IP: 10.255.255.72
LDAP Server
IP: 10.255.255.14
– Has a context of o=home
– Has a group call LCMAdmins
– Has m3srvadm set up as a user which is part of LCMAdmins
– Clear text passwords are turned on
For convenience I’ve set the network for the adapters to “Private” and turned off the firewall for the private network.
I’ve also changed the IP properties for each of the servers so they have the m3.desperatedesigns.org suffix added to their name. (Local Area Connection -> Properties -> Internet Protocol Version 4 (TCP/IPv4) -> Properties -> Advanced -> DNS -> DNS suffix for this connection
DNS Server is set up as follows:

Preparing the Servers
There are a number of preparations we need to undertake to make the install nice and smooth, all of them are documented, but if you’re doing an install from start to finish, it can be pretty disjointed.
Preparing M3BE10 – the Business Engine Server
Install Microsoft SQL Server
I referenced the M3BEIG_14.1.2.0_W.pdf extensively. Most of it though is very much follow your nose.
- Insert the CD/Connect the ISO
- Click on Setup
- Click on OK to install the .Net Framework

This took several minutes on my server before anything came up – but I was installing Windows on another guest - Eventually the “SQL Server Installation Center” will appear. Click on Installation

- New Installation or add features to an existing installation

- Setup Support Rules will run and should show no errors

Click on OK - Set the key appropriately

Click on Next - Accept the license terms
- Click Install
- All things going well, you should have no errors

Click Next - Select SQL Server Feature Installation

Click Next - Select as follows

Click Next - Installation Rules should pass

Click Next - Click Next at the Instance Configuration (Default instance is ok)
- Click Next after the disk space requirements
- Use the same account for all SQL Server services (I used the Administrator account and password as this is a testing environment)

- Click the Collation tab and then Customize

Set as Latin1_General
Binary - Click Next
- Change the Account Provisioning to Mixed Mode, key in the sa password and add the current user as an administrator
 Click Next
- Error reporting – Click Next
- Installation Configuration Rules – should have no failures. Click Next
- Click Install
- Go grab a coffee
- If all goes well, you should get to a complete screen which tells you the server has successfully installed.
- Install the service pack –just follow the onscreen prompts
- All going well, that too will install without error
Configure SQL Server
Then we need to make a couple of modifications to the settings of the SQL Server. These, like the steps above are documented in the M3BEIG_14.1.2.0_W.pdf guide, infact I am really just copying them for the sake of completeness.
- Open the SQL Server Configuration Manager
- Under SQL Server Services, set the following services to Automatic, and start if they aren’t already
SQL Server
SQL Server Agent
SQL Server Browser - SQL Server Network Configuration -> SQL Server Network Configuration -> Protocols for MSSQLSERVER -> TCP/IP should be enabled
- SQL Server Network Configuration -> SQL Server Network Configuration -> Protocols for MSSQLSERVER -> TCP/IP -> IP Addresses -> TCP Port should be static
Install the Java Development Kit (32bit)
- Start the install of Java
- Next
- Again, we’ll change the path of Java to c:\Java\jre6
- Click Next
- Click Finish
-
Check Java is in the path
You can do this by typing java –version at a dos prompt. If you don’t get the Java version information it’s not in the path.- Open Server Manager -> Change System Properties -> Advanced -> Environment Variables
- Under System variables verify that the Path has a path to Java (eg. C:\Java\jre6\bin)
Preparing M3ISO10 – the Smart Office Server
Install the Java Development Kit (32bit)
- Start the install of Java
- Next
- Again, we’ll change the path of Java to c:\Java\jre6
- Click Next
- Click Finish
-
Check Java is in the path
You can do this by typing java –version at a dos prompt. If you don’t get the Java version information it’s not in the path.- Open Server Manager -> Change System Properties -> Advanced -> Environment Variables
- Under System variables verify that the Path has a path to Java (eg. C:\Java\jre6\bin)
Preparing M3LCM10 – the LifeCycle Manager Server
Install the Java Development Kit (32bit)
- Start the install of Java
- Next
- Again, we’ll change the path of Java to c:\Java\jre6
- Click Next
- Click Finish
-
Check Java is in the path
You can do this by typing java –version at a dos prompt. If you don’t get the Java version information it’s not in the path.- Open Server Manager -> Change System Properties -> Advanced -> Environment Variables
- Under System variables verify that the Path has a path to Java (eg. C:\Java\jre6\bin)
Install .Net
We will need to add the role for .Net3.5, install .Net4 and then install .Net4.5. The LCM server is what we are going to install our Smart Office client on, so it needs .Net installed up to 4.5
.Net3.5
- Open the Server Manager
- Click on Features

- Click on Add Features
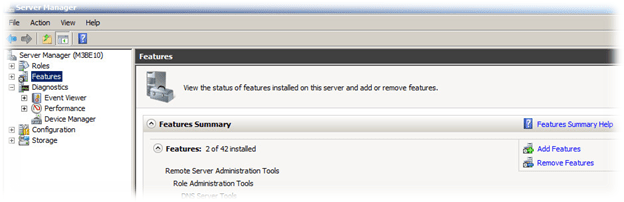
- Put a tick in the .Net Framework 3.5.1

- Click on the Add Required Role Services

- Click Next
- Click Next
- Click Next
- Click Install
.Net4
- Double click on the dotNetFx40_Full_x86_x64.exe
- Accept the license terms
- Click Install
- Click Finish (should take 5-10 minutes)
.Net 4.5
- Double click on the dotNetFx45_Full_x86_x64.exe
- Accept the license terms
- Click Install
- Click Finish (should take around 5 minutes)
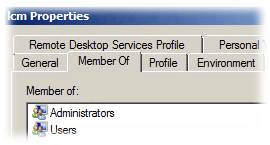
Add An Accont for the LifeCycle Manager Server
- Start Server Manager -> Configuration -> Local Users and Groups
- Create a user account to run the LCM Service account

- Add lcm to user Administrators group

- Start -> Administrative Tools -> Local Security Policy -> Local Policies -> User Rights Assignment
- Add the user to the following entries
Log on as a service
Deny access to this computer from the network
Deny logon locally
Deny log on through Remote Desktop Services
Install the LifeCycle Manager Service
This will be done on the M3LCM10 server. (10.255.255.71)
- Run the LifeCycleManager install (LifeCycleManagerServer_9.1.12.0.msi)
- Click Next
- Fill in the User Information and click Next

- Specify the binding, because I have DNS all set up and working (hopefully) then I’m going to bind against the FQDN

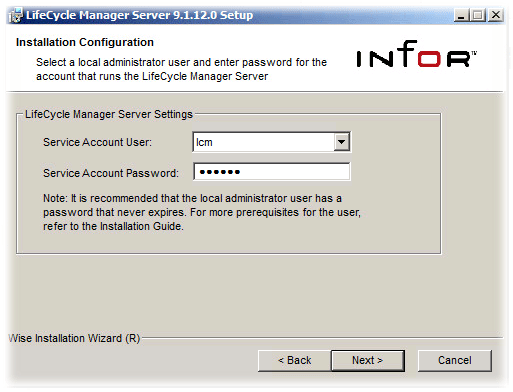
- Select the lcm user we created earlier and enter the password
- Backups are for wimps 🙂 Select Configure backup routines later

- Because I am using my LDAP server I will select “Manually configure settings for a central LDAP server”

- Set up your LDAP Server – mine is as follows

I haven’t enabled SSL as this is a test network with a total of 1 user 🙂 - My LDAP Server is Novells eDir, so I have to make a number of changes (noteably the Userprefix and User search filter – for AD they should be left as they are)

Click Next - We’ll use the default path, so click Next
- Next and the install should begin.
- Click on Finish
- Start -> Administrative Tools -> Services
- Find the LCM-Server service, right click and select Start
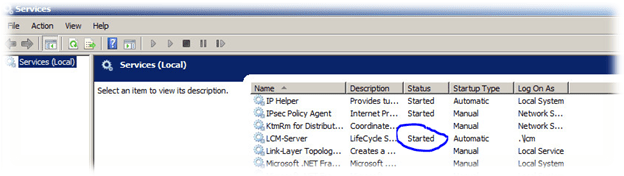
- Wait a few seconds and refresh the services (press F5). It should say “Started”, If not, there is probably an error in the configuration settings supplied earlier.
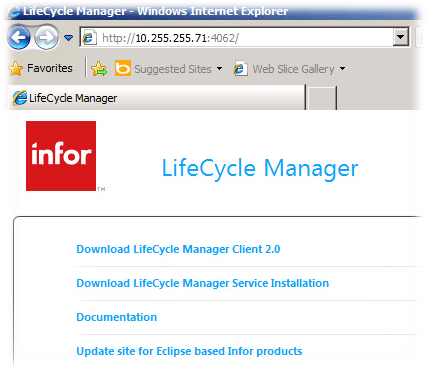
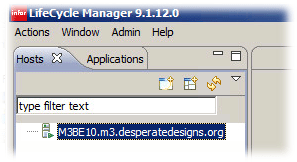
- Open Internet Explorer and browse to 10.255.255.71:4062 (my LCM Servers IP Address) and you should get the LifeCycle Manager page

If you don’t see this page, then do a refresh on your services page to ensure that the LCM-Server is still running, if it isn’t then there is probably an error in the settings that you used.
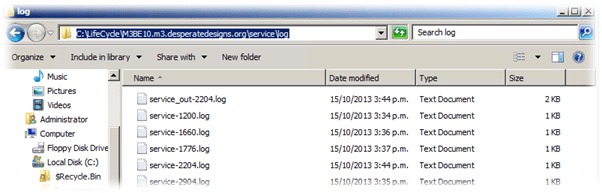
If there are issues starting the LCM service then looking in the C:\Program Files (x86)\Lawson\LifeCycle Manager\Server\Log directory should give you some clues as to what is going wrong.
Install the LifeCycle Manager Client
This will be done on the M3LCM10 server. (10.255.255.71)
I was originally concerned when I did this the first time as the client came up as 9.0.3, however, you will be told that LCM needs to be updated and it will update to the correct version. I actually spent a while troubleshooting this – retrieving different versions etc 😦
- Open Internet Explorer and browse to http://10.255.255.71:4062
- Click on “Download LifeCycle Manager Client 2.0” save and run the installer following all of the default prompts
- Attempt to run the LifeCycle Manager (9.1.12 initially comes up as 9.0.3), you will be told that LCM needs to be updated, up and then restart LCM as prompted and then you will be presented with the following:

- Login and the click Open LifeCycle Manager and you should see the familiar LCM windows
Again, if you have issues, take a look at the logs – they are typically quite verbose and very useful in guiding you to where the problems are.
Install the LCM Client Service on the BE Server and ISO Servers
This will be done on M3BE10 (10.255.255.70) and M3ISO10 (10.255.255.72)
Note, Java should have already been installed on both servers.
This section is based upon the LCMIG_9.1.12.0_W.pdf guide
I’ve recycled the screenshots, so be conscious of the server names. 🙂
Add An Accont for the LifeCycle Manager Server
- Start Server Manager -> Configuration -> Local Users and Groups
- Create a user account to run the LCM Service account

- Add lcm to user Administrators group
- Start -> Administrative Tools -> Local Security Policy -> Local Policies -> User Rights Assignment
- Add the user to the following entries
Log on as a service
Deny access to this computer from the network
Deny logon locally
Deny log on through Remote Desktop Services
Install the LCM Client Service
- On M3BE10, start Internet Explorer and go to http://m3lcm10:4062

- Click on Download LifeCycle Manager Service Installation
- If prompted, add m3lcm10 as a trusted site
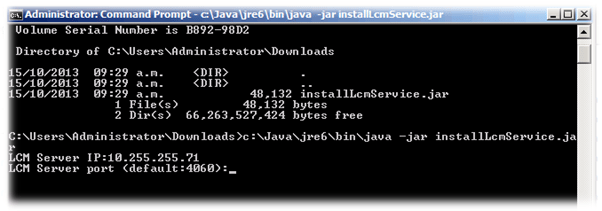
- Open a DOS prompt and navigator to the directory where you downloaded the installer for the LCM Service
- Now we need to run the installer, we need to type the full path to the Java install and the path to the LCMService installer
Type in the full path to the Java install, eg. C:\Java\jre6\bin\java –jar installLCMService.jar
Note: don’t do what I did, and that was when installing Java I had only changed the path for the jre and not the jdk, so I was attempting to install the service off the jre which wasn’t working.
Note: I was using the 32bit command prompt launched c:\Windows\SysWOW64\cmd.exe - Enter the LCM Server IP (10.255.255.71)

- LCM Port (we are using the default of 4060)
- Enter the server admin, we are using m3srvadm

- Enter the password

- Then it will download the updates from the LCM server – this will verify the username and password
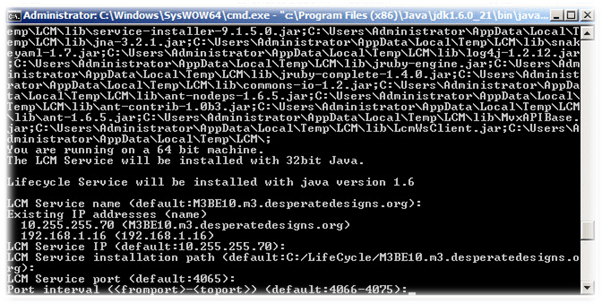
- Press enter for the name

- Press Enter for the default IP

- Press enter for the default installation path

- Press enter for the default port

- Press enter for the default port intervals
- Enter our lcm service

- Enter the lcm password

- Accept the cert
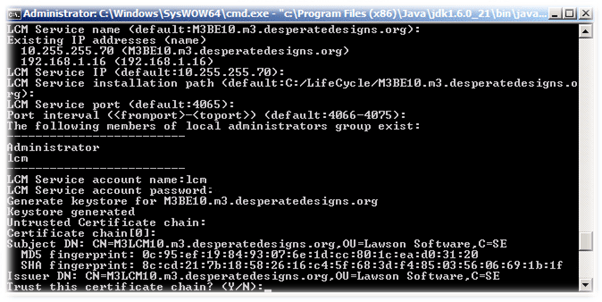
- And assuming you weren’t me and put in the wrong password then the LCM service should start and run, and automatically register against the LCM Server
Things of interest
- I screwed up the Java install to start with and fixed it, installed and things still didn’t quite work properly (invalid local account password) and I ended up reinstalling java which meant the Java path changed. I couldn’t start the LCM service and it turns out that was due to a registry setting
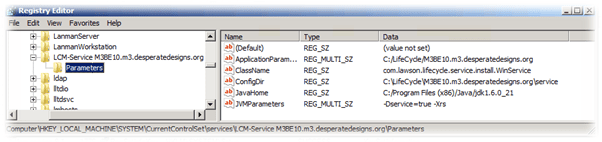
This is also set in the setlcmjava.cmd file, so I needed to change it too
- If the service doesn’t start, then look at the service\log directory
- With the install of the ISO server I managed to get the Java install a little messed up, so my path to java was actually c:\jdk1.6.0_21\jre\bin\java –jar installLcmService.jar
Load the Foundational Installs in to LifeCycle Manager
This will be done on the M3LCM10 server. (10.255.255.71)
- Login to LCM
- Click Admin -> Admin View
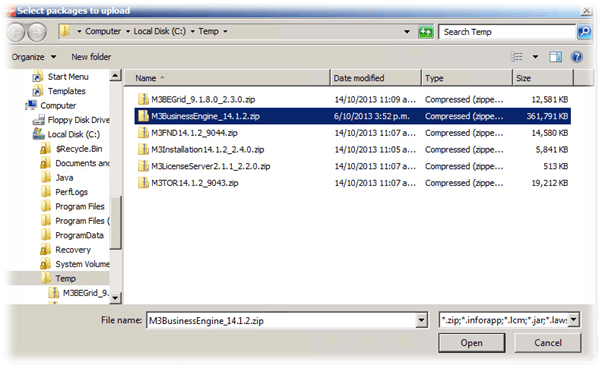
- Click on Upload and locate the selected packages

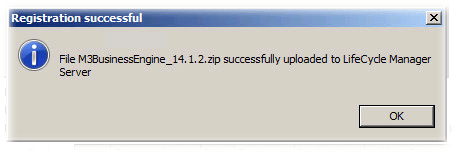
- Click Open and after several seconds you should see a registration successful dialog box
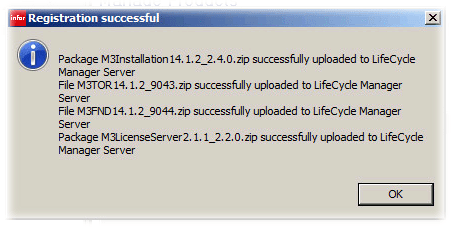
Click OK - You’ll now be prompted to update LCM, click Yes

- You’ll be prompted to restart LCM, click ok

- When you restart LCM, if you look in the Applications tab you’ll see some new entries. Likewise if you go to the Admin -> Admin View you should see the packages that we uploaded
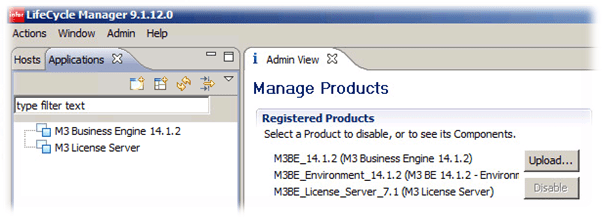
Note, we selected 4 packages, but under the Manage Products, only three are registered. If you click on the M3BE_13.1.2 you’ll see it has two registered components (M3FND_9044.zip and M3TOR_9043.zip)
- Now we upload the Business Engine itself. Click Upload
Click on Open - You’ll be prompted to verify the package
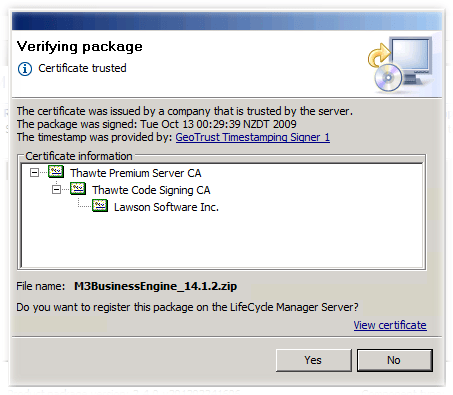
Click Yes - And with a little bit of luck you should see
- Registered components will now show 3 entries


Wonderful! thank you a lot.
Very Nice. thanks
I’m wondering if you have an experience with making DR site for M3.
the problem which we have that we need to change the IP addresses for M3 Servers on DR. but after changing the IP it wouldn’t work.
Please guide and appreciate your help.
Hi Mohammad,
yes, I designed the DR site for M3 for IFL. I essentially ‘cheated’ by not changing the IP addresses. It all depends on your specific requirements, we had a ‘warm’ DR site so we would replicate our Windows servers via Veeam each night to the DR location. Our AS400s were multi-homed, so they had an ip for the production network 192.168.1.x, and then the PRD AS400 had a secondary ip of 192.168.10.x and the DR AS400 192.168.11.x. I had to set up a static route on both AS400s so the traffic to the 192.168.11.x and 192.168.10.x had a source address that wasn’t the primary address.
PRD would backup its database and then ftp it to the DR AS400s 192.168.11.x ip address, and that server would then restore the DB to the DR server.
It was a pretty cheap solution that would take less than an hour to spin up and be testing our environment. We’d potentially loose a 24 hours worth of data but that was acceptable to us.
It’s probably worth a post so it’s a little more visual and easier to understand. I’ll see if I can throw together a post soon.
Cheers,
Scott
Do